|
A router plane is an extremely accurate hand tool that has the ability to increase the efficiency of your hand and machine tool woodworking. Many woodworkers don't realize that the router plane is not a direct replacement of a power router. It uses the same physics in that the blade makes a cut to a specific depth from the reference surface (the sole). Understanding how to correctly use router planes can ultimately help you to:
-
Fit tenons accurately by cutting them fat and then slowly paring them down to final size with the router plane.
-
Establish the depth of a dado or groove (if your tablesaw bed is not dead flat, when you cut the dado the board will flex causing an uneven dado. This will make your case not come together cleanly and accurately and will contribute to gaps and racking over time. Taking a few passes of the router plane will ensure level depth throughout the entirety of the dado).
-
Create rabbets that are dead 90 degrees to the surface of your panel.
-
Create hinge mortises faster and without the fuss of a power router.
-
Create recesses for inlay.
-
Make sliding dovetails by hand.
You will find yourself taking adaptations of the above processes and using the router plane for many other applications. Often when working with power tools, when the bit hits tough grain, the whole tool could be torn to one side or the other, damaging your work and endangering yourself. Learning to use accurate joinery planes like the router plane allow you to still execute these tasks with relative speed while working in a safe environment. First, I will explain the adjustments of the tool.
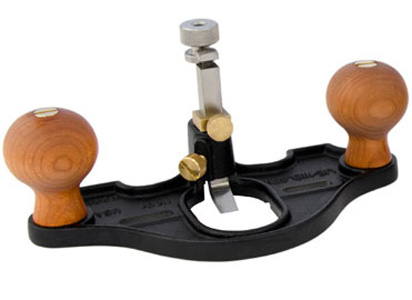
Note: In the below pictures, I am using images of a
Lie-Nielsen Router Plane
as these adjusters are in the same position as the antique Stanley and Record versions.
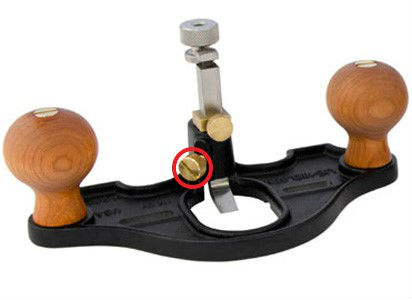
The Lock Screw
The lock screw is tightened and loosened before and after every adjustment of the tool. When the lock screw is tightened adequately, the blade will ideally not slip in use. When you want to adjust the depth of the plane, you first loosen the lock screw. Next you will use the depth adjustment nut to guarantee the depth of cut. Finally, you will retighten the lock screw. Note: On a Veritas router plane, the lock screw is found on the back of the collar.
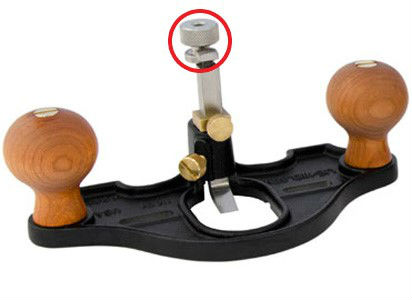
The Depth Adjustment Nut
The depth adjuster controls how far the blade projects from the sole. To make an adjustment, first loosen the lock screw, then:
-
To advance the blade turn the Depth Adjuster Nut clockwise. When you have reached the desired depth, retighten the lock screw to avoid slippage when taking a heavy cut.
-
To retract the blade rotate the Depth Adjuster nut counter-clockwise. Once you have reached the desired projection, make sure to retighten the lock screw.
The Depth Stop
A depth stop is an accessory that has been added by modern makers to the classic router plane designs. A depth stop greatly increases the accuracy of the tool by ensuring that you slowly dial in to the right final depth. Simply adjust the depth adjuster nut to the final depth and tighten the depth stop at this point (a quick tip on tenons and dados is to dial the adjuster in to the final depth and use the corner of the blade as the marking gauge. Thus, when you get to the final depth it will be the exact final marking depth indicated by your knife line, ensuring an accurate fit). Then, back the blade off and work the material down to that point in slow increments. It is typically good practice to remove no more than 1/16th of an inch per adjustment. This will ensure a good quality finish surface and no torn grain. The Lie-Nielsen design locks the depth adjuster on the blade itself, while the Veritas is on the threaded rod that the depth adjuster nut rides along. I personally feel more secure locking onto the blade as opposed to slowly wearing down the threads that allow the plane to adjust smoothly.
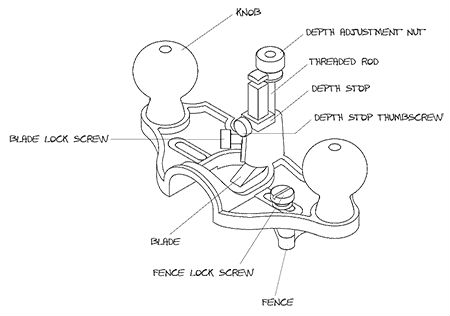
Below is a diagram provided by Lie-Nielsen that labels all of their parts. This is the same plan that is used on the Stanley No. 71 and 71-1-2:

|
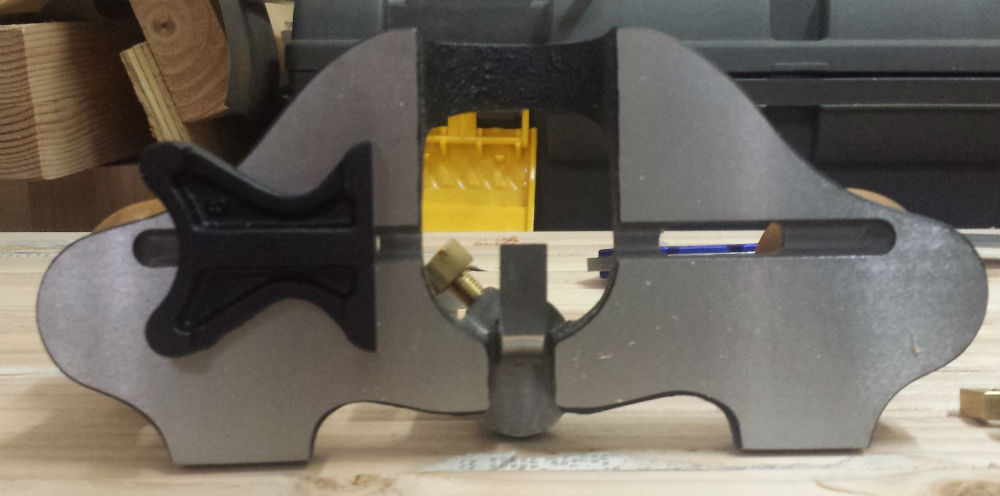
Fence
The Lie-Nielsen and traditional Stanley models come with a fence that could be attached to either side of the blade in order to create grooves or settings a specific distance from the edge of a board (the Veritas offers a fence for purchase separate from the tool). The fence slides into a groove on the bottom of the plane; then slide it the desired distance from the blade and then lock the screw down. There are two sides to the fence: one for straight work and one for addressing curved projects. The plane below is set up for straight work:
Usage
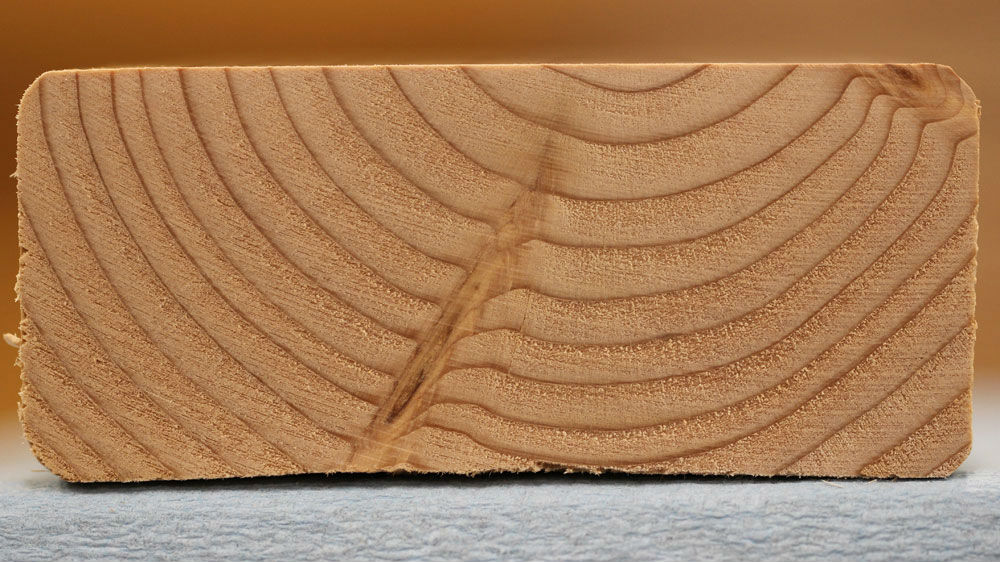
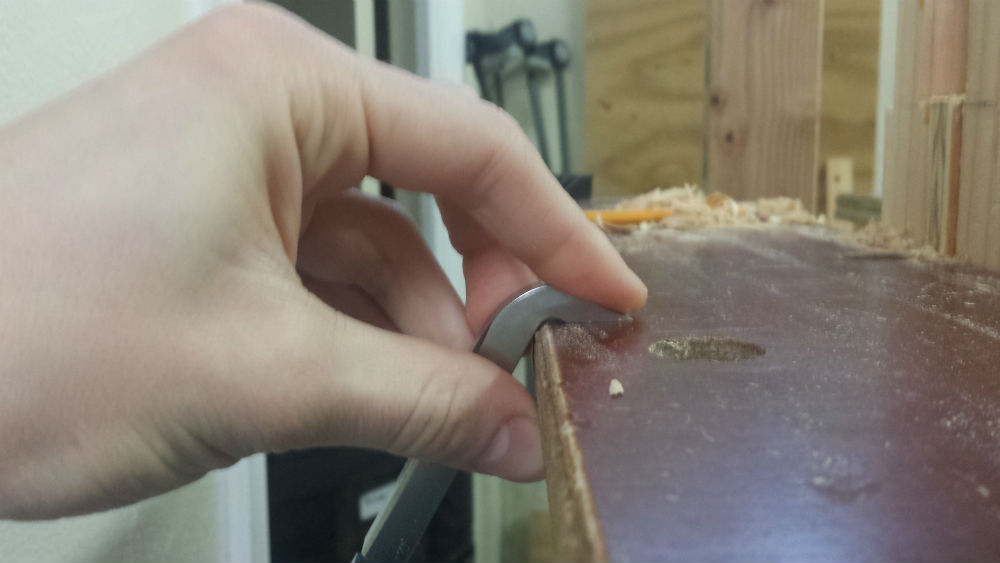
The key when using a router plane is to think about the technique that one would use when paring with a chisel, and translate this into the approach you take when working a router plane. When you are hitting tough grain, skew the chisel and employ a slicing action. If you ever look at a piece of wood, you will notice the standard heartwood and the darker, denser late season growth rings. When using a router plane, or any other edge tool, the blade often struggles when it hits these tougher sections:
By skewing the blade and approaching it as you would a paring chisel, you will effectively slice through the dense annual ring without dulling the blade, ripping out the wood grain, or worse, hurting yourself.
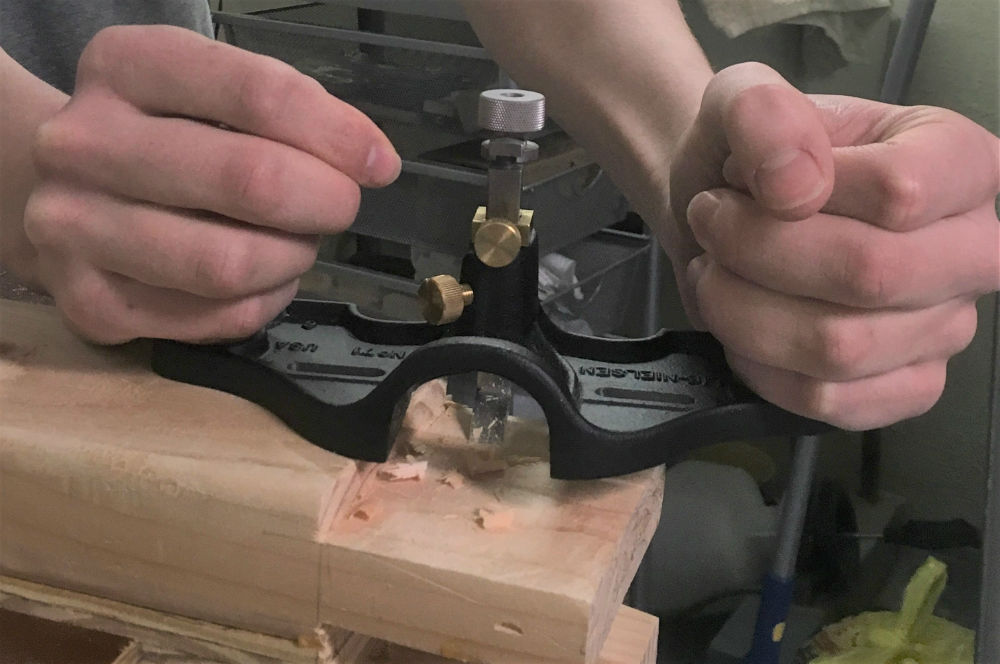
Generally speaking, when addressing a tenon or exposed surface it is advisable to take careful note of pressure distribution. In the below photo, I demonstrate a common method for addressing long tenons by extending the sole. This photo makes it easier to see where your pressure should be:
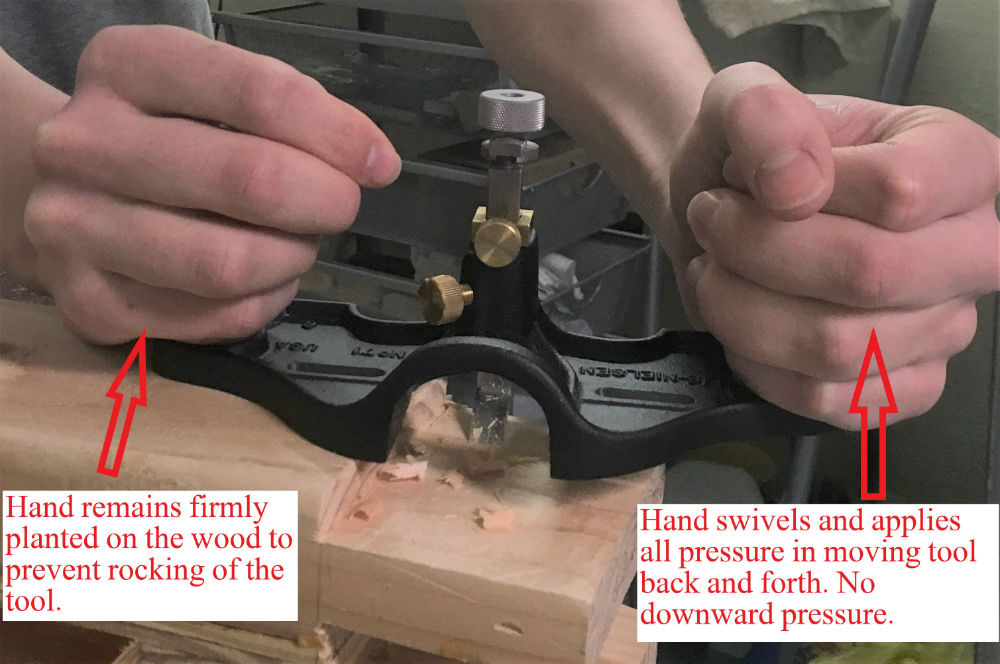
The hand that is on the panel (reader's left, my right) has hard downward pressure. This is the anchor, pivot point. The hand that is over the tenon (reader's right, my left) is used to swivel back and forth. As you tackle different parts of the tenon, you will change the pivot point of the left hand (his right) in order to hit the desired location. The plane will only cut in the high sections and lower them down to the low points creating a perfectly flat tenon surface. This motion can be compared to pivoting in basketball, where one foot must remain planted while the other is able to move and swivel freely. In the below photo, I have edited in the arrows indicating the back and forth swivel formula:
This decreases the resistance against the blade making an easier cut. It is really important to maintain very strong downward pressure with the planted hand to ensure that the plane doesn't inadvertently tip and take a heavier cut on one side of the blade, causing an out of square tenon.
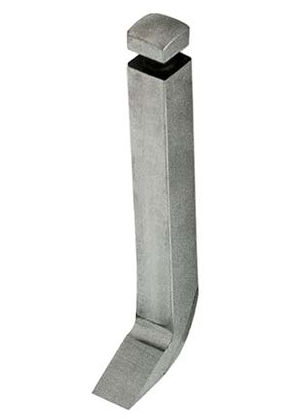
Sharpening
Sharpening router planes is a topic that has troubled many woodworkers who are used to being able to employ the use of jigs. The Lie-Nielsen Router Plane follows the lead of the antique Stanley and Record planes that consisted of one solid piece of bent steel. This creates a very steady vibration free cut, but is difficult to sharpen without practice (the Veritas model has a removable shoe that can attach to a standard honing guide, however I will address the unique issue caused by the bent cutter). To read about straight blade sharpening, check out my article on hand planes by
clicking here
.
The best way to sharpen traditional router planes is to hang them off the side of the stone and reference along the long factory bevel as recommended by Lie-Nielsen:
You will very quickly get used to sharpening this way and as long as you are sure to keep even pressure across the entirety of the bevel, you will not run into issues. Sharpening the bottom of the blade is very simple in that you just lie it flat on the stone and sharpen as you would any chisel or plane blade.
To view Lie-Nielsen Router Planes available at Highland Woodworking,
click here
.
Samuel Colchamiro is a hobbyist woodworker who works solely with woodworking hand tools. He enjoys writing, and is hoping to share his woodworking expertise with others to make their woodworking experience more enjoyable. You can email Samuel at
scolchbm@gmail.com
Return to the
Wood News Online
front page
|