|
|
|
|
Project Idea: Building a Wooden Chess Board
By Tyler Straach
|
|
|
In the last few months, my 8 year old son has taken an interest in playing the game of chess. He learned
how to play on a cheap board with plastic pieces. Combine that with the fact that I recently learned about a
new local store selling many varieties of hardwood and what you have is a pretty good reason to
convince the wife that you need to do some woodworking!
I am by all definitions an amateur woodworker. I don't pretend to be as skilled or knowledgeable about
woodworking as many of the people who frequent this newsletter. So when I say that this is a project
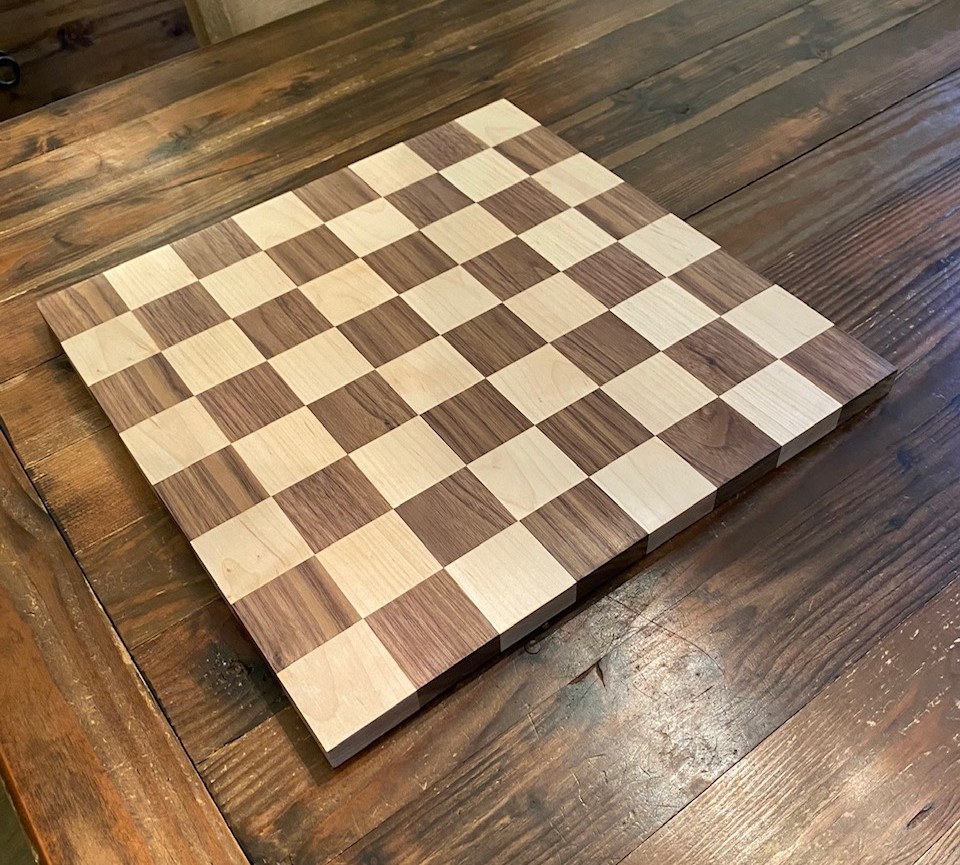
that anybody can complete, I truly mean that. The following plans are for a board that has 2" squares
giving it a total size of 16" x 16".
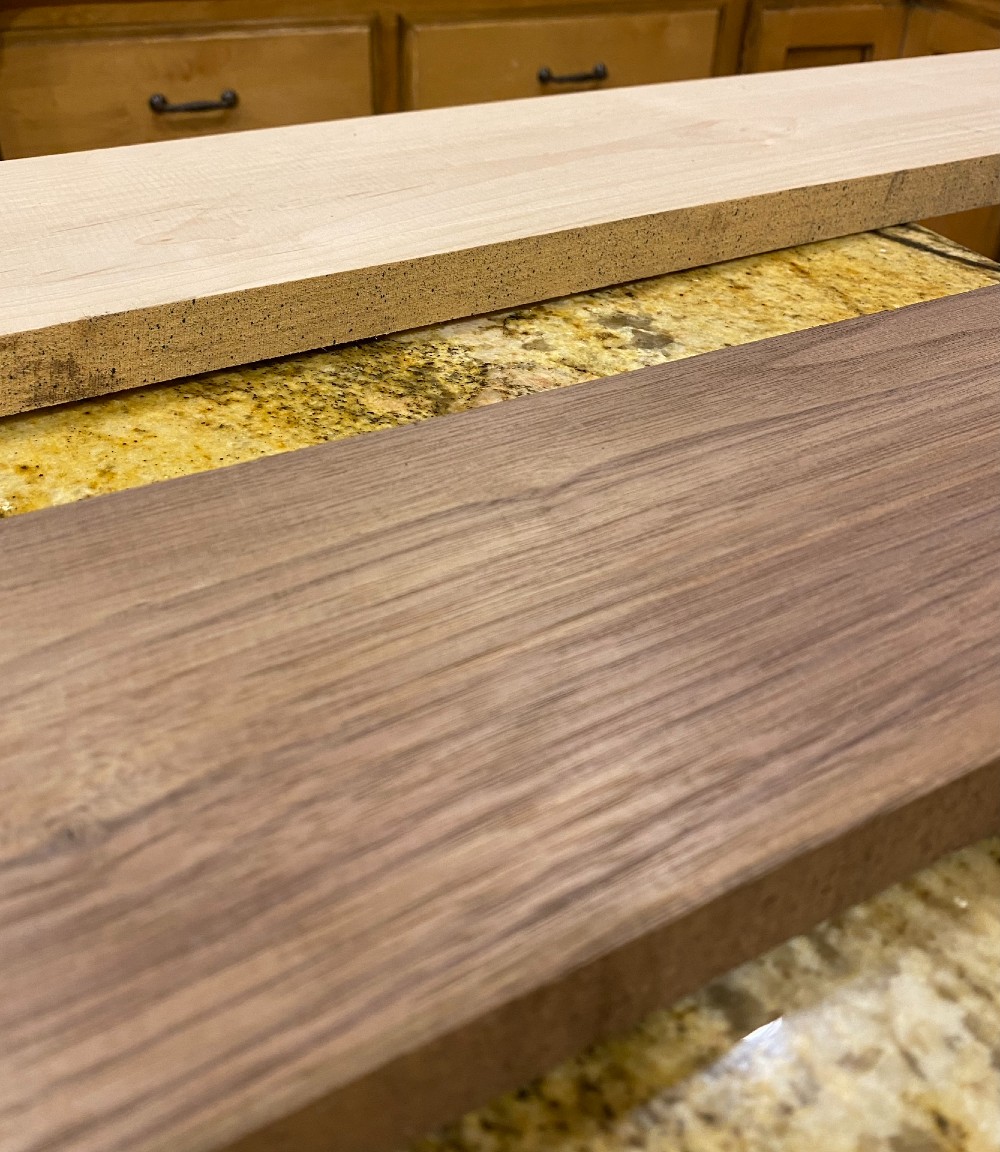
I started by picking up some walnut and maple from my local supplier. I went with 13/16" thick board.
You could definitely go thicker than this, but I wouldn't suggest going much thinner.
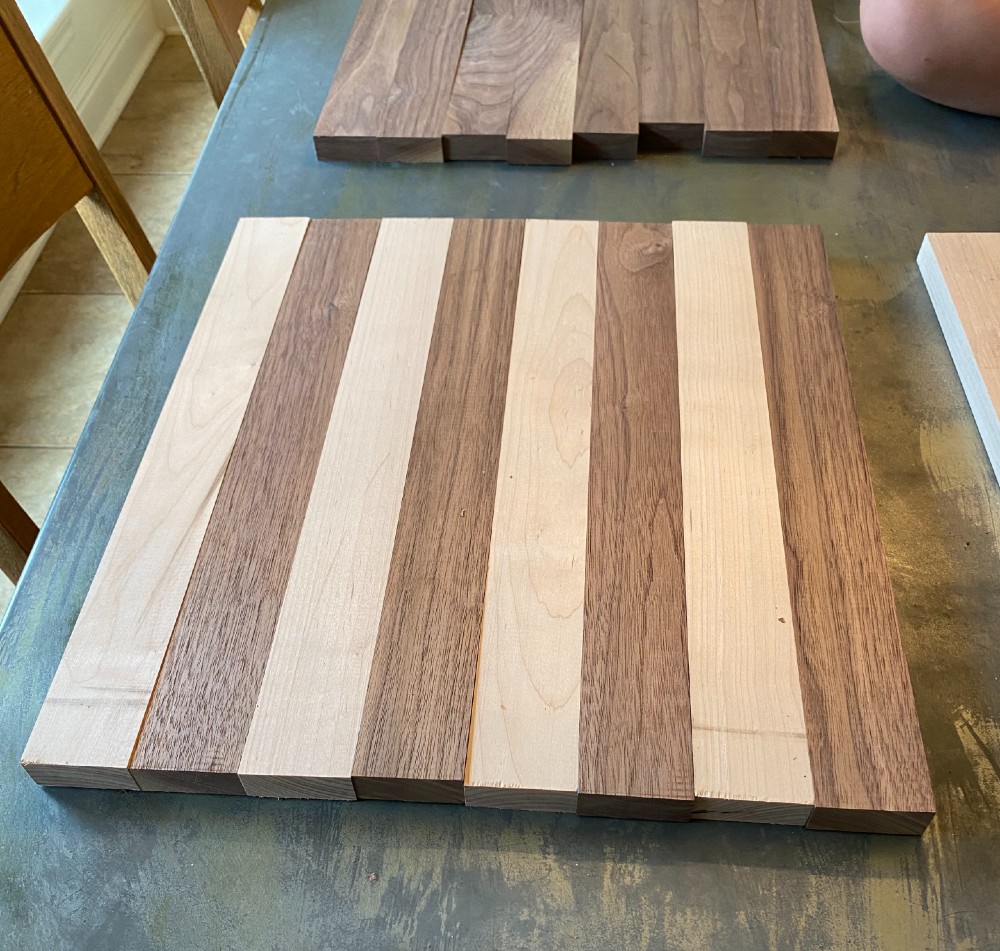
I decided to cut to length first, and then rip my boards to width second. I cut each board to a length of
18". The additional length is needed because later on each of these boards will be cross cut 7 or 8
times and you will lose at least 1 inch of length. The boards I purchased were 5" wide so I only
needed 4 of these 18" boards (2 from each type of wood) as each would be cut into two 2" wide
boards. I then ripped the 4 boards on my table saw to a width of 2" giving me four 2" by 18" pieces of walnut and four 2" by 18" pieces of maple.
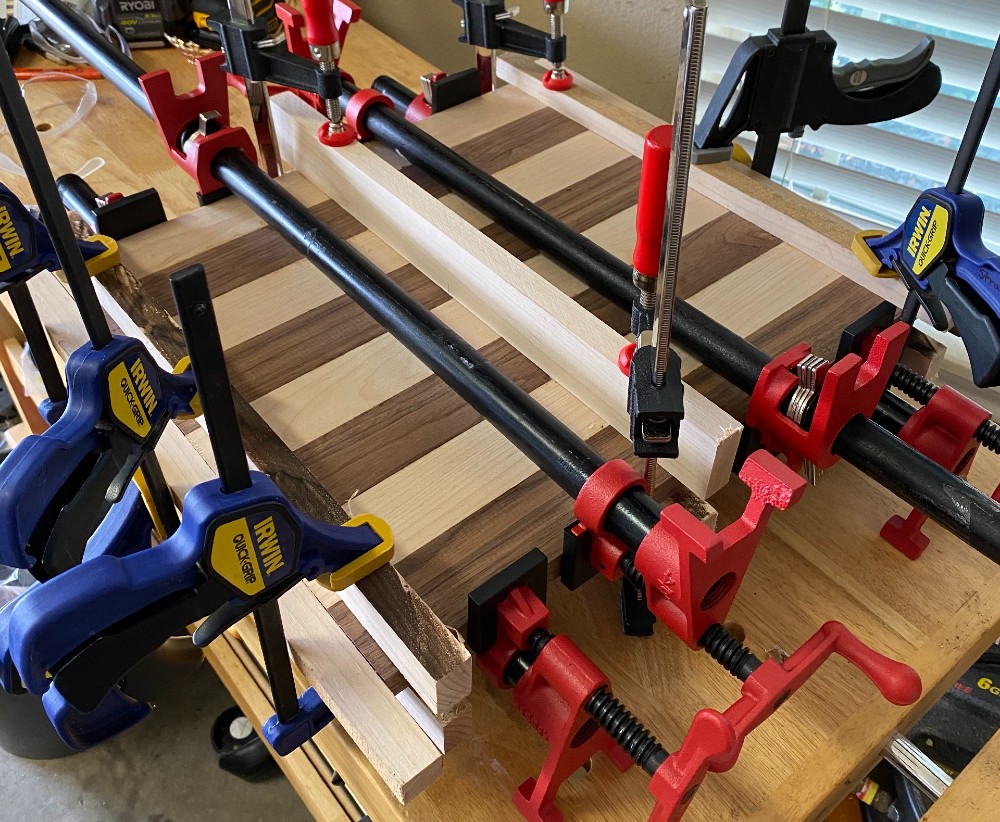
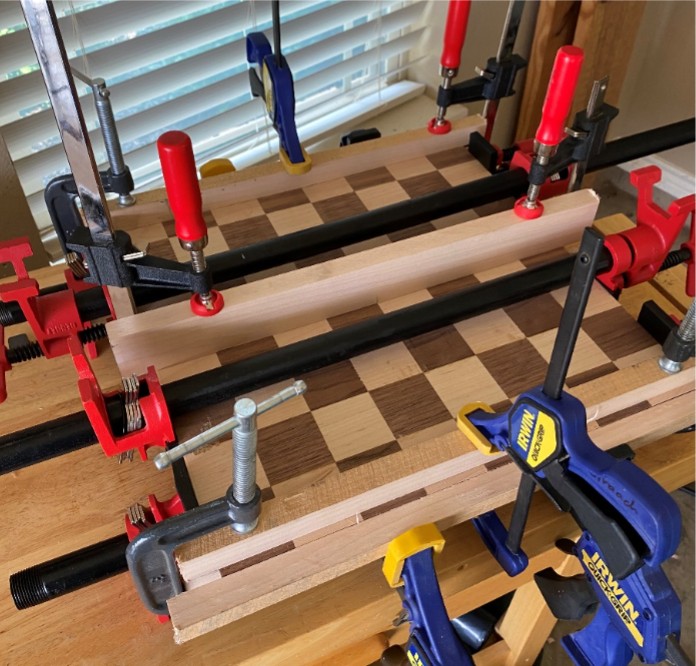
Next comes the fun part: glue up. I used 4 pipe clamps to compress across the joints and a number of
other clamps and scrap pieces of wood to keep the board straight. I recommend you practice how you
will clamp up before you actually apply your glue. Sometimes the number of clamps being used on a small
piece often leads to situations where one clamp may not work well right next to another clamp and you
may need to change your game plan.
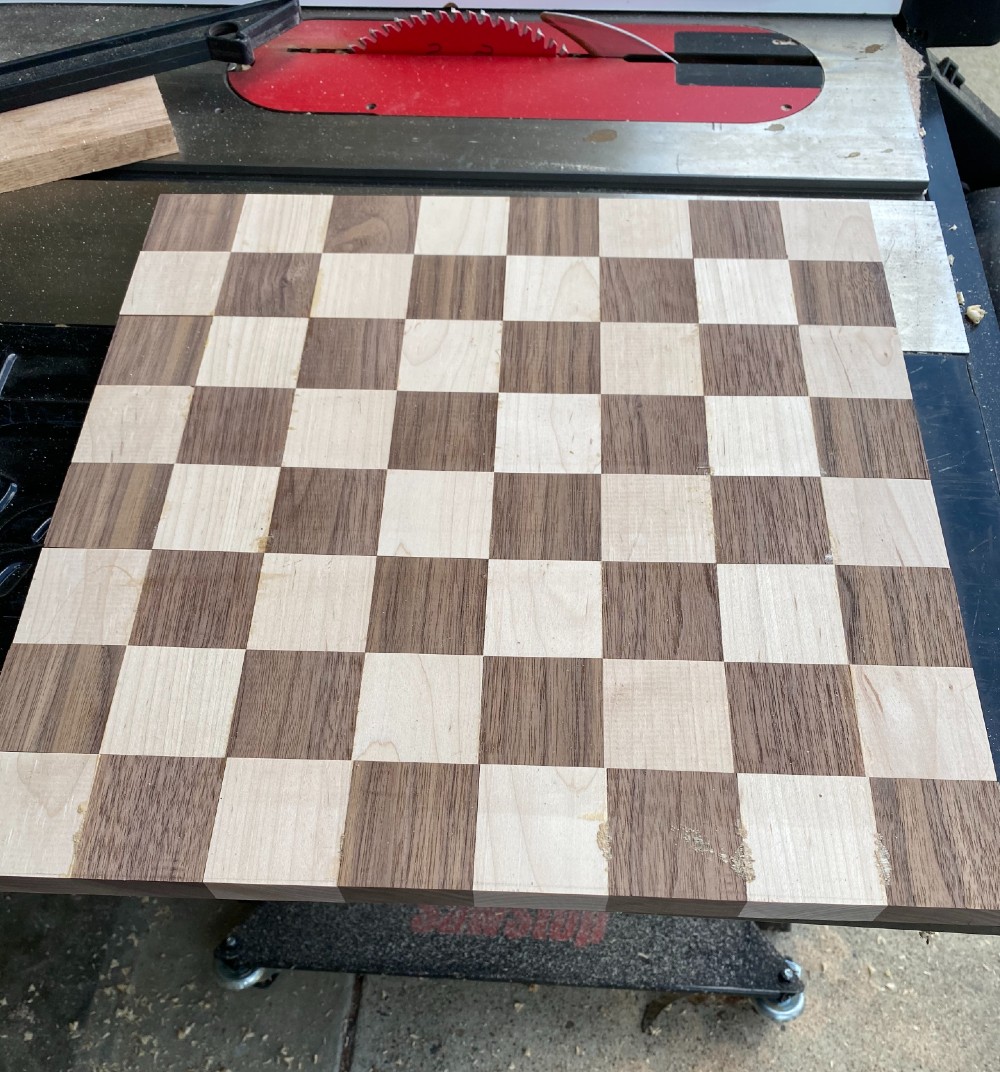
Once the glue has completely dried, it's back to the table saw to cut 2" strips across the glued up
boards. You will once again cut eight 2" strips. I kept the boards in order and then rotated every
other board 180 degrees.
Next you perform another glue up just as you did before. This time it is extremely important to make sure that each line lines up perfectly before applying the clamp pressure.
After the glue had about 24 hours to dry, I sanded with a random orbit sander to remove glue and
smooth out any little imperfections. I started with 80 grit and worked my way up to 300 grit. Lastly, I
used some paste finishing wax to seal the board and give it some shine.
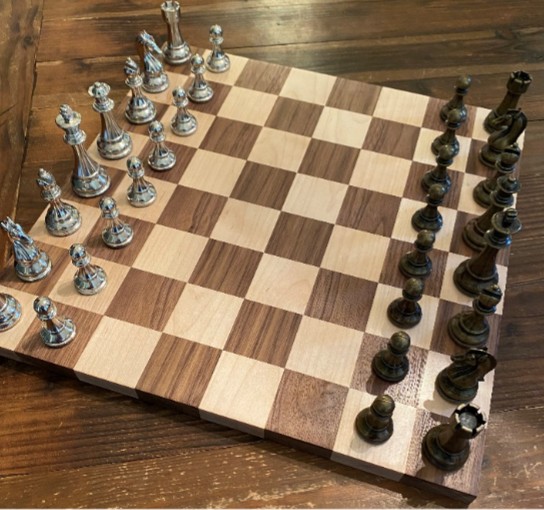
One thing to think about before you start this project: pick out your chess pieces before you make your
board. Officially, each square on your chess board should be 4/3 of the diameter of the base of your
king. My king piece had a base diameter of 1.5" and therefore, 2" squares were the
appropriate size. However, if your pieces are bigger or small than this, you may need to adjust the size
of your squares so that they are appropriate for each other.
Tyler Straach lives in Longview, TX. You can email hiim at
tjstraach@gmail.com
.
Return to the
Wood News Online
front page
|
|
|
|
|