|
Click on any picture to see a larger version.
Turning the Corner
focuses on using woodturning on the lathe as a way of enhancing cabinetry, furniture designs, and architectural installations. Each article also suggests an important woodworking book to read, reread or listen to, and a link to an appropriate article in
The Highland Woodturner
. Along the way, these articles seek to inspire woodworkers (cabinetmakers, carpenters, and housewrights) to extend their skills into basic, novice, and advanced woodturning while discovering for themselves this particularly sensual and spiritually rewarding dimension of working with wood.
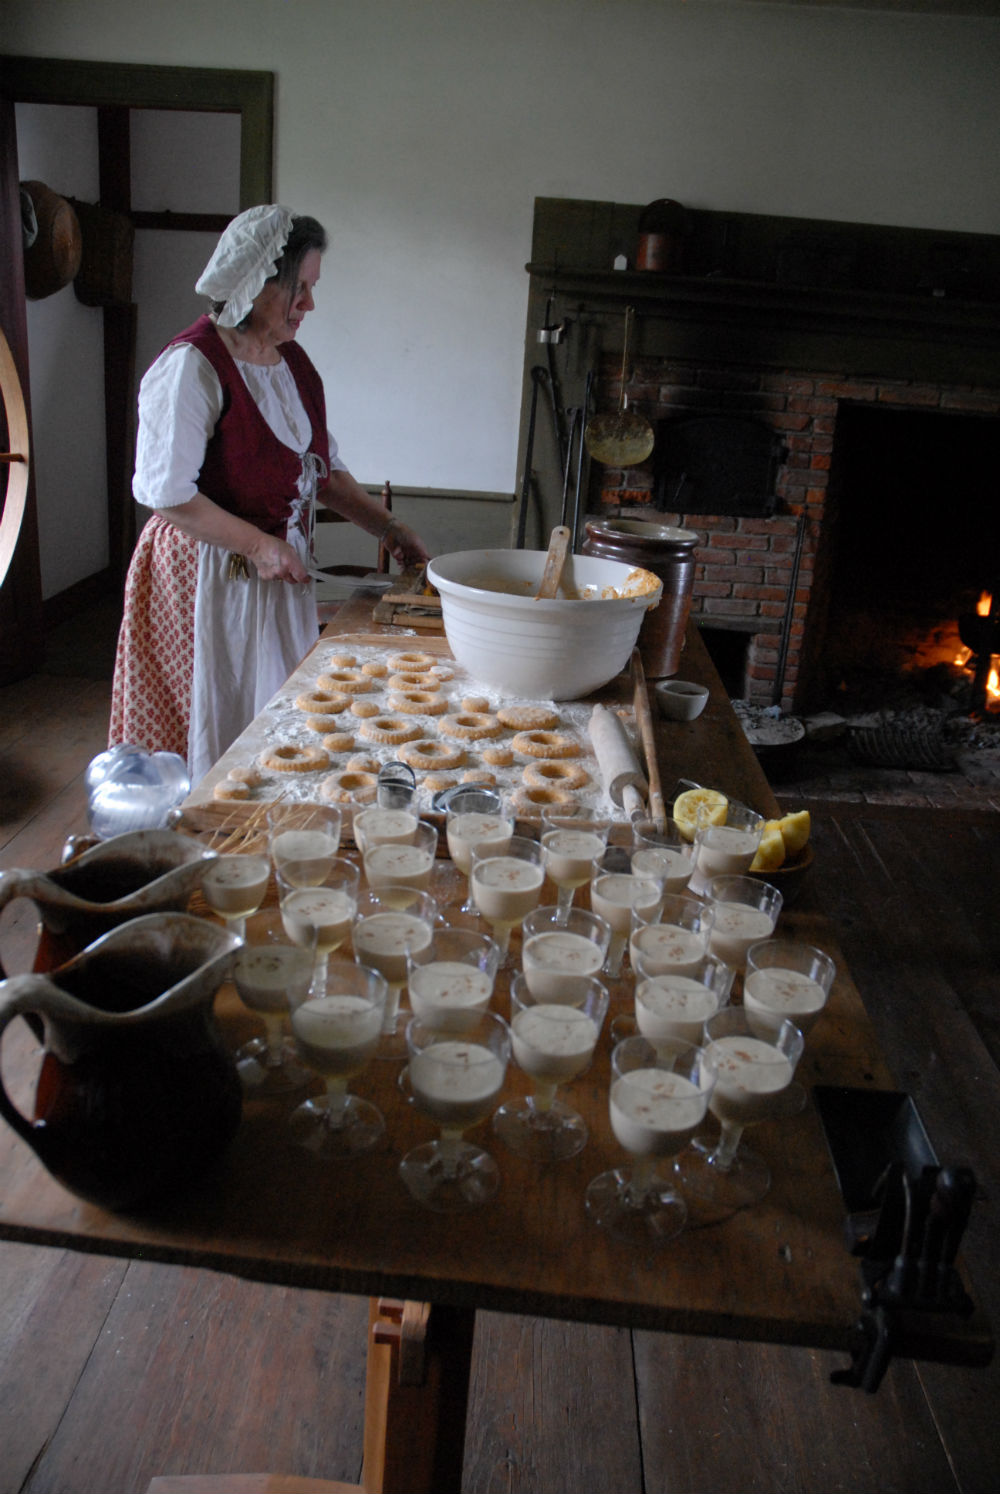
As part of the
Wilson Museum's
"Living History" presentations in the summer months,
Executive Director Patty Hutchins dons her beautiful, handmade colonial dresses and
moves in to the restored colonial kitchen in the
1763 Perkins House
to make and bake
a variety of baked goods (breads and biscuits) in the wood-fired oven. My favorite things she makes are the most delicious squash
donuts. Her baking is much to the delight of the watching audience and especially the many
participating volunteers!
As Patty prepares and then fries the donuts in the hot oil, she must reach for her most
critically important, special donut hook, an historically accurate kitchen tool that has been
custom made for her use to fetch the hot new donuts from their cooking oil.
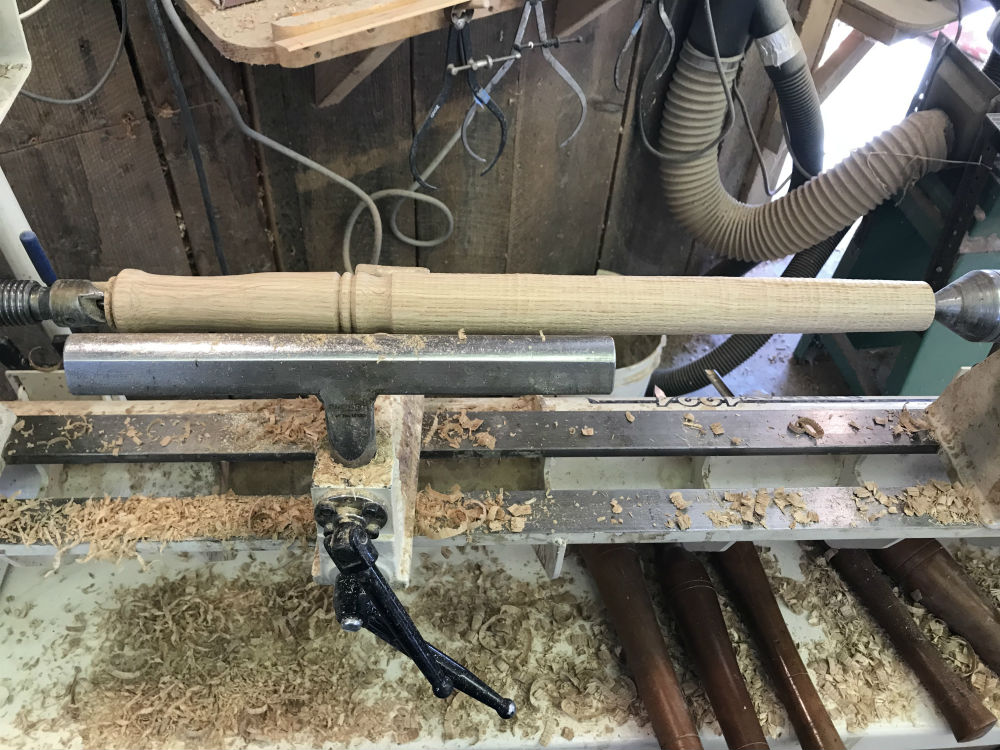
To begin making this fun and useful tool, prepare a 1-1/2" X 1-1/2" X 18" block of
hardwood that will be turned and then steam-bent. Oak, both red and white, are plentiful
and well-suited to this process.
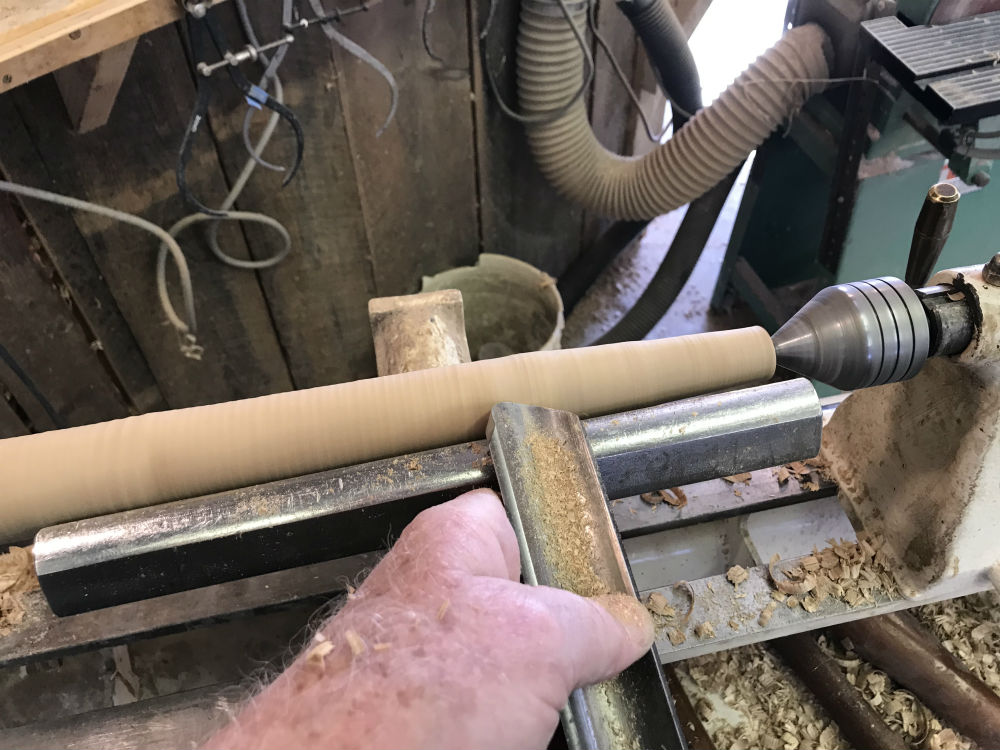
Once the blank is rounded, form the handle on the headstock end (large mass by the
power). This is an opportunity to seek a balance between artistically attractive and
useful. If this hook will be for a particular cook as in this case, sizing the handle diameter
and spacing the decorations for most comfortable use can make it pleasing and attractive
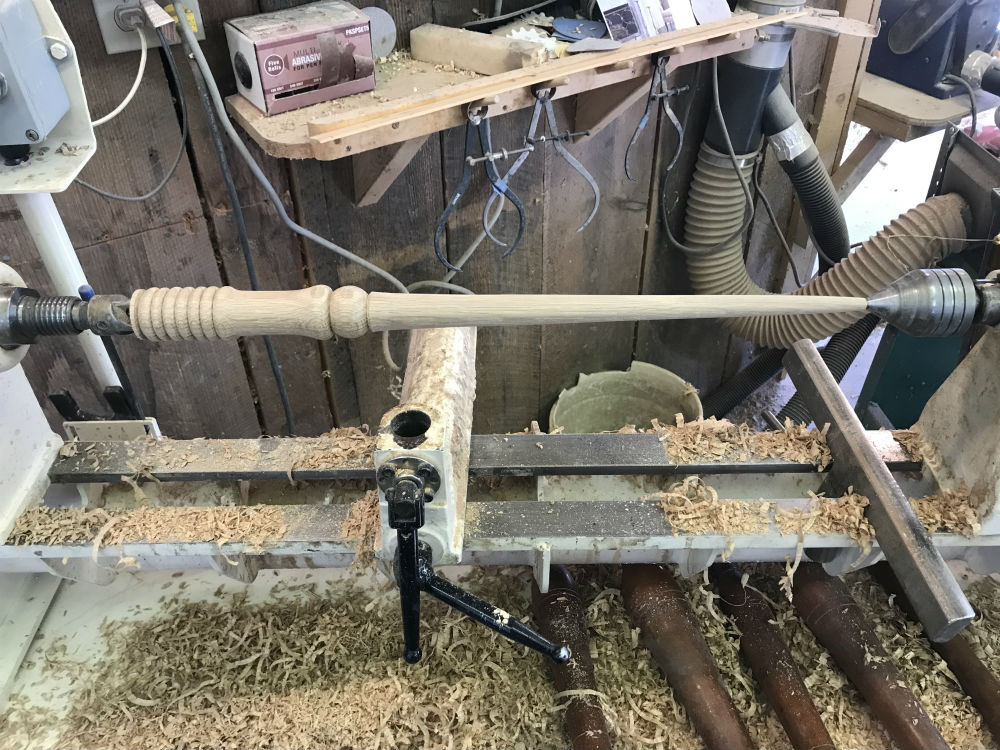
to use. The handle length might vary between 4" and 5-1/2".
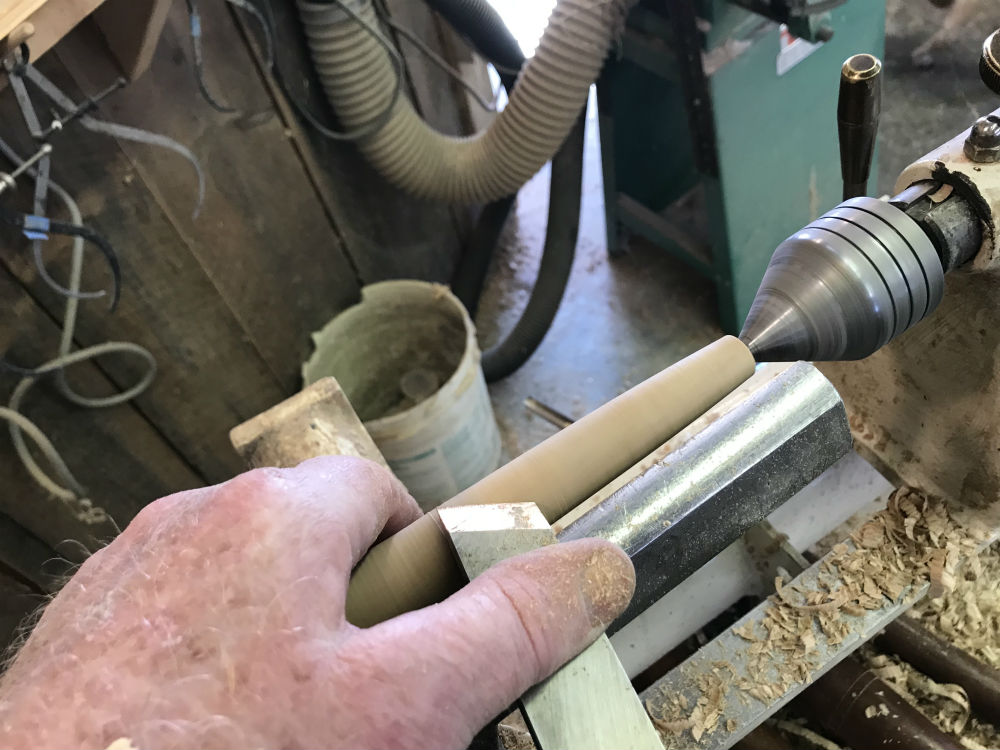
For many novice and beginner woodturners, achieving an attractive taper can be a
challenge. Too often the turner begins the cuts near the beginning (largest diameter)
where the least amount of wood will be cut away. By cutting too much wood away at
this point, the taper deteriorates early and does not flow evenly to the thinnest point. A
more effective way to cut an even taper is to start cutting with a medium or roughing
gouge a few inches back from the point (tailstock end) and -- following Spindle Rule #2:
"Cut from Large toward Small" -- cut to the right, pressing for a deeper cut as the cut
continues.
The next cut should start an inch or so to the left of the previous cut, and again cut toward the point.
The following cut should start an inch or so to the left of the previous cut, and again cut toward the point.
The next cut should start an inch or two to the left of the previous cut, and again cut toward the point always working the flow of a steady, smooth cut that tapers toward the tailstock.
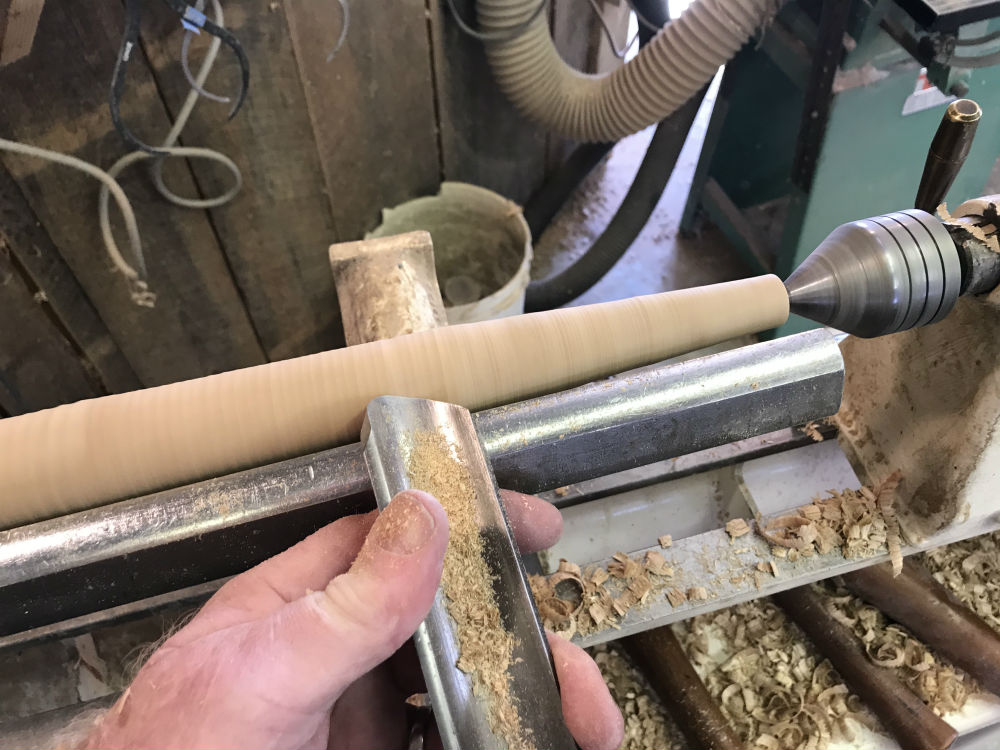
Working up toward the transition detail between the handle and the blade, the next cut
should start an inch or so to the left of the previous cut, and again travel evenly ever
smaller in diameter toward the point.
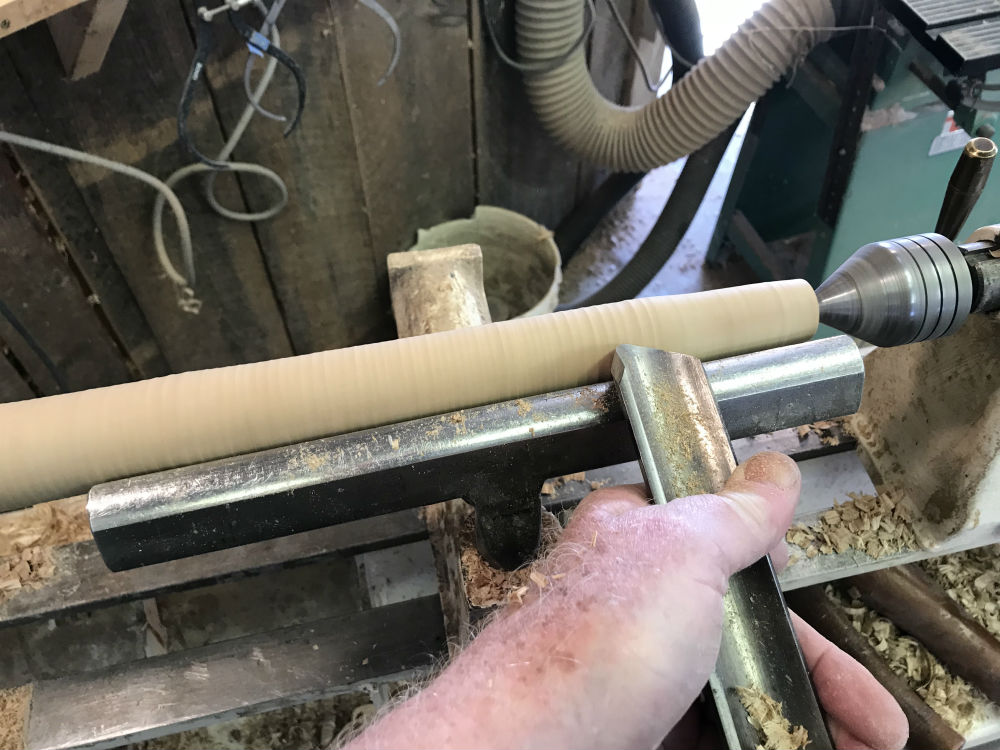
Once the taper is established, still slightly oversized, the final smoothing cuts will work best using a skew chisel.
As with any turning long and thin, the skew will need some support to cut without chatter. The ideal 13" of blade should be approximately 1" at the large diameter/transition tapered smoothly to slightly less than 1/4".
Curling the fingers of one hand firmly but not too tightly around the spinning blank can
do this, and by placing the thumb on the blade of the chisel to steady and guide it in the
cut can work well. Typically, this smoothing skew cut is safest from left to right, large
diameter toward small; but working to learn how to do it with either hand (good personal
challenge) and to cut backwards from right toward left, small toward large, can add a tool
versatility that expands the turner's skills in a beneficial way.
Some turners, particularly in the beginning, use a leather glove for this method to avoid
burning their hands. The same glove with the fingers cut off can also work. A little
practice makes this method of skew cutting extremely useful in many turning applications.
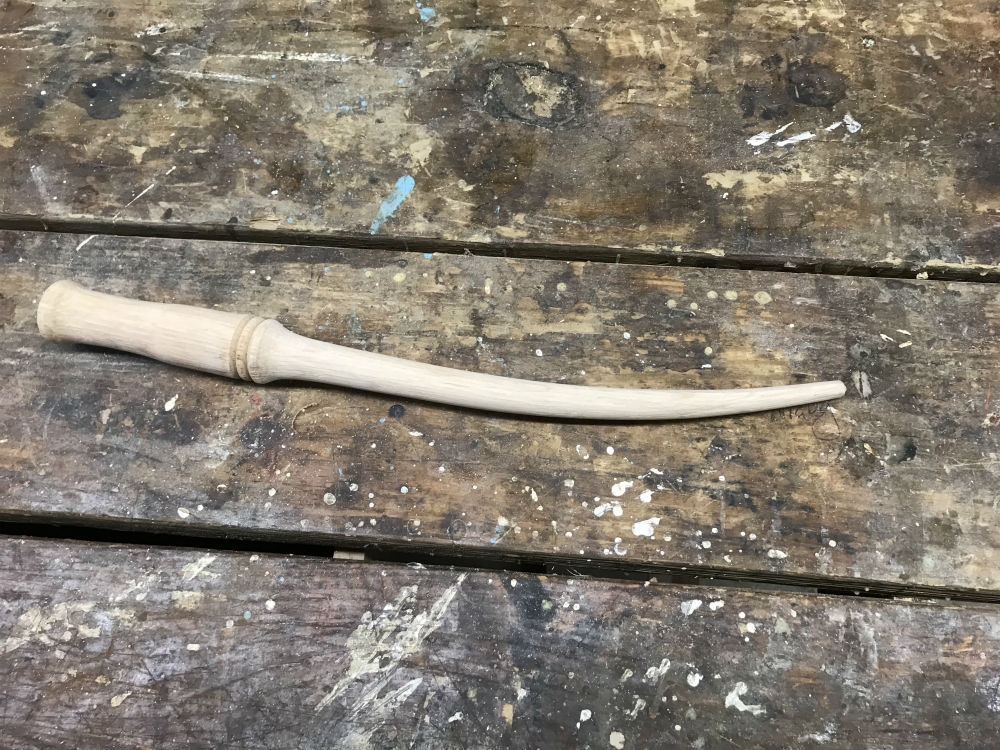
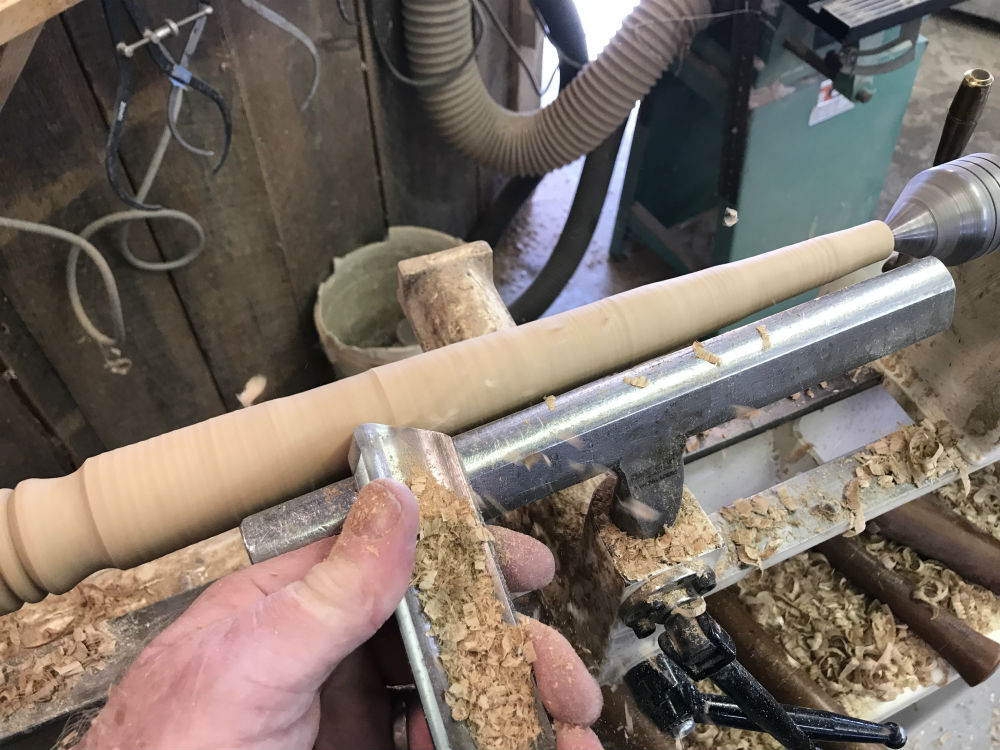
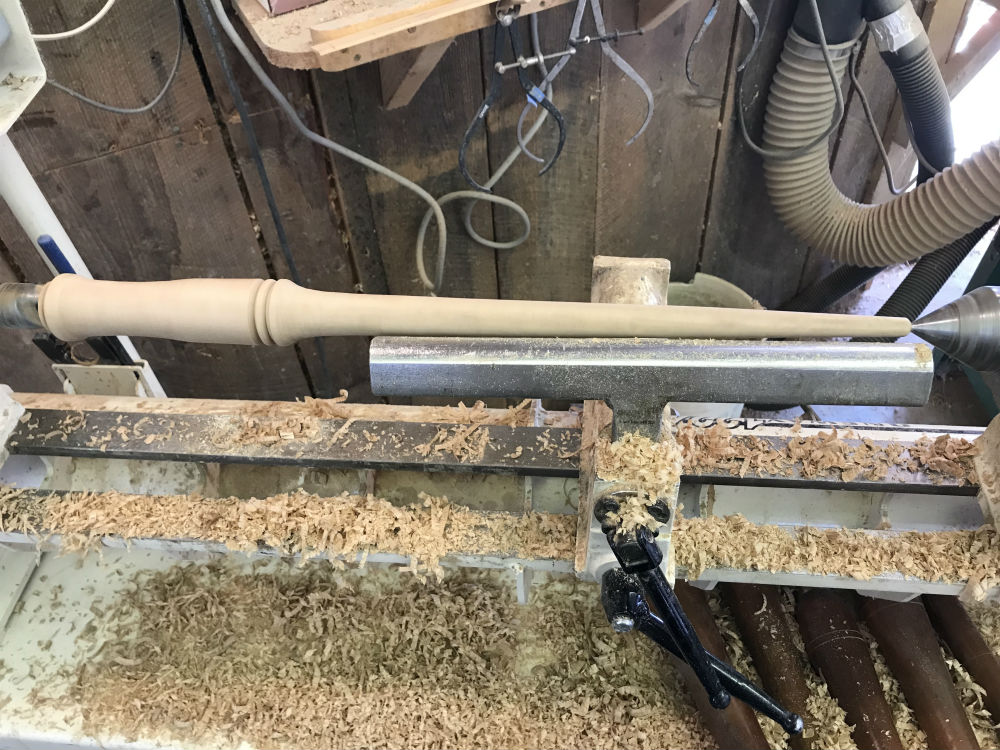
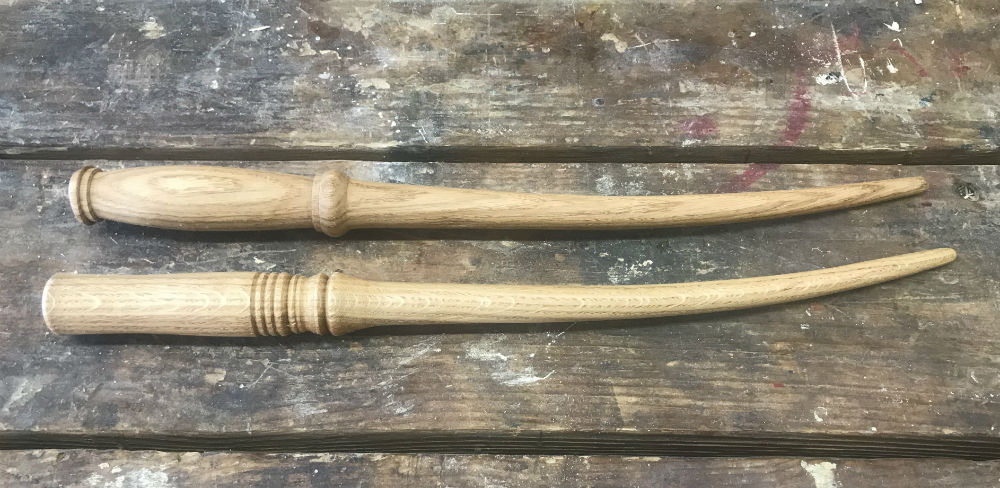
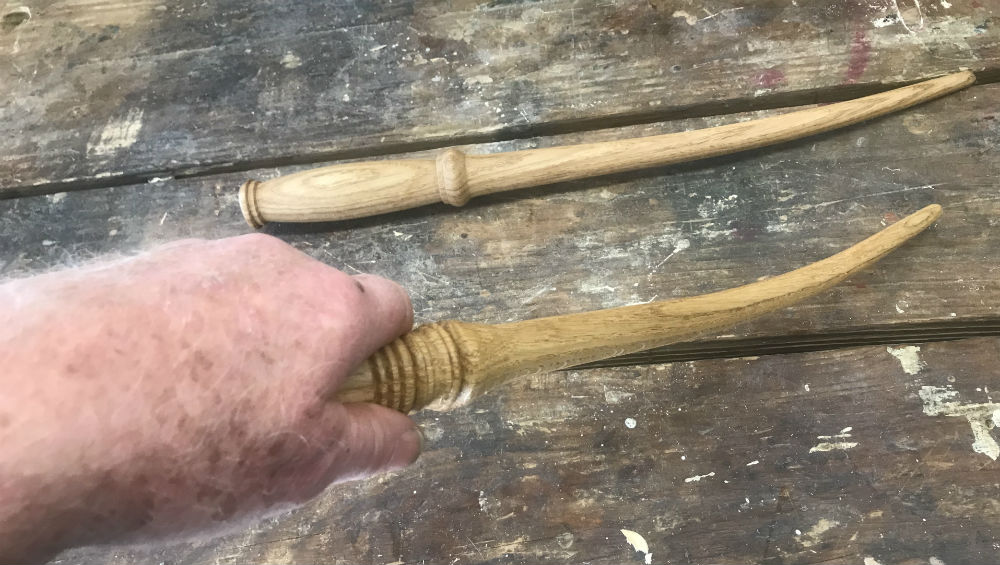
Once the tapered blade is smoothed and sanded, stand back and gain a sense of what the
newly turned donut hook looks like. The taper for this should be at first fairly steep and
then shallow as the piece thins to allow the bend to be gradual at the thicker part and
more steeply angled at the thinner part.
Sanding from underneath with the lathe running to about 320 or 400 grit at this point is relatively simple. Do not apply any finish at this point because the steaming will ruin that.
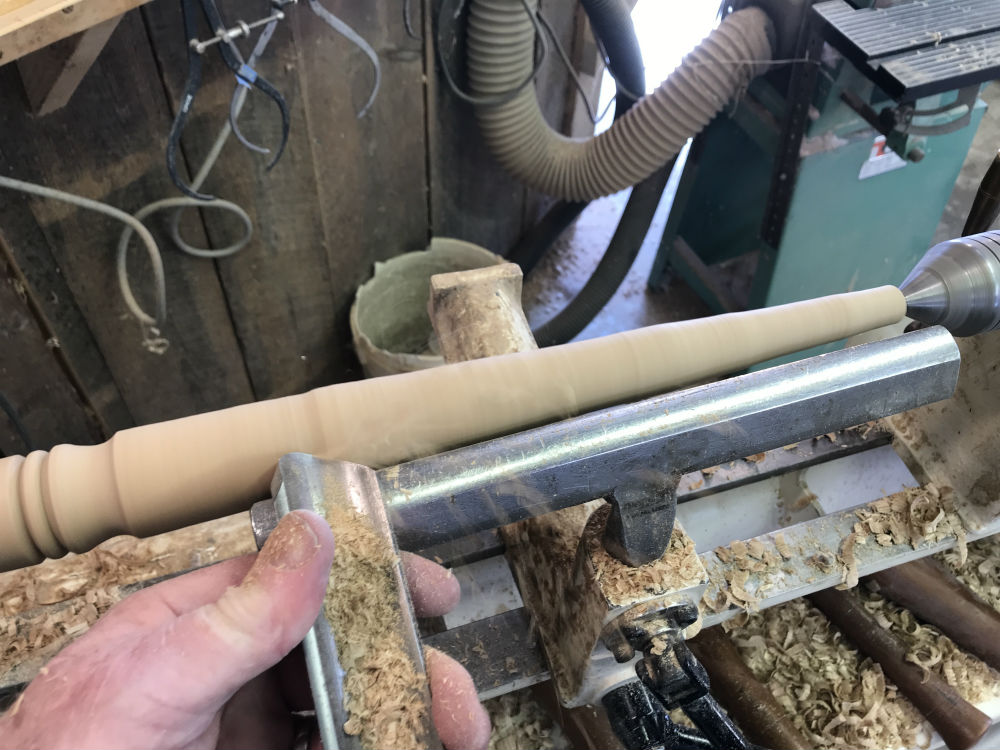
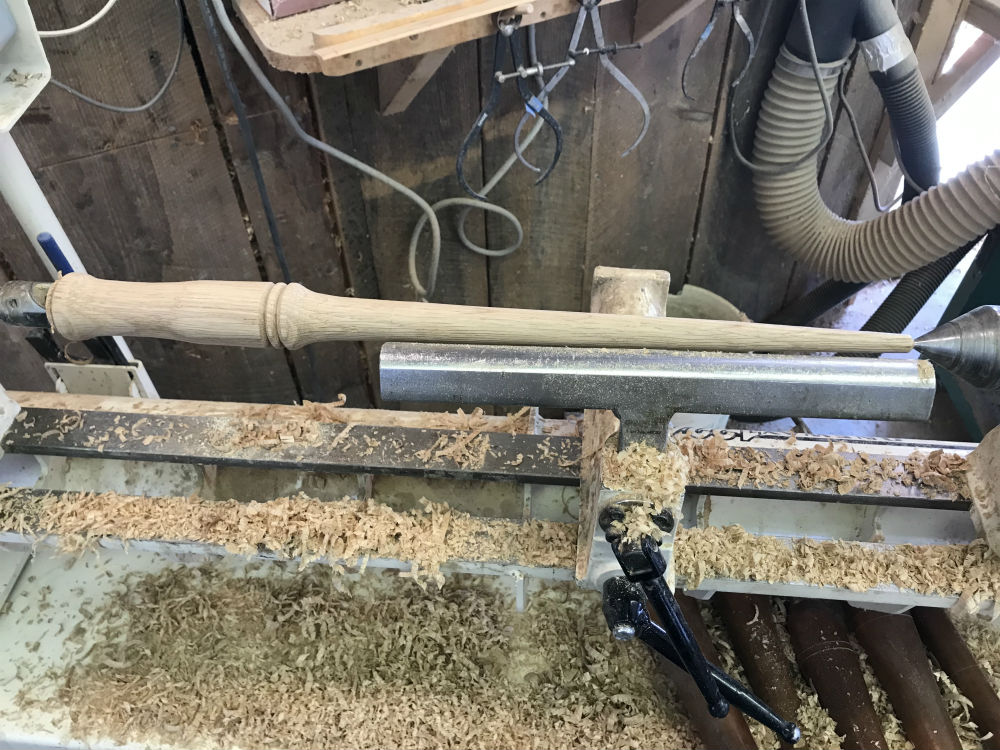
This second hook photo offers a different interpretation for the design of the handle and its transition to the blade, but the blade is similar, a steady flowing taper to the less than 1/4" point.
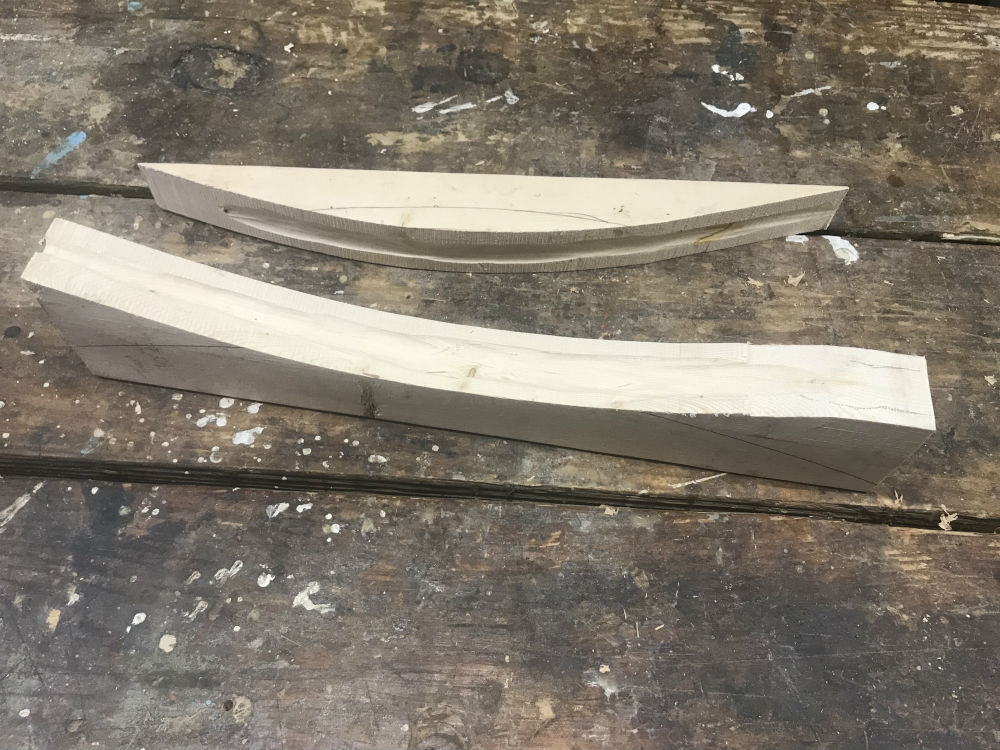
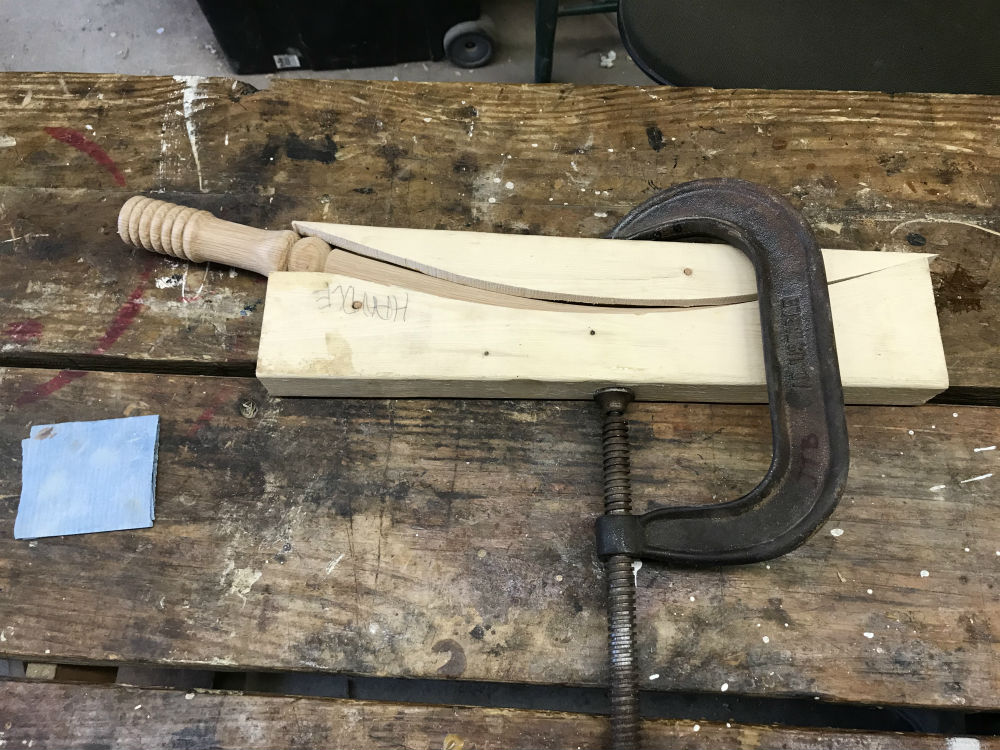
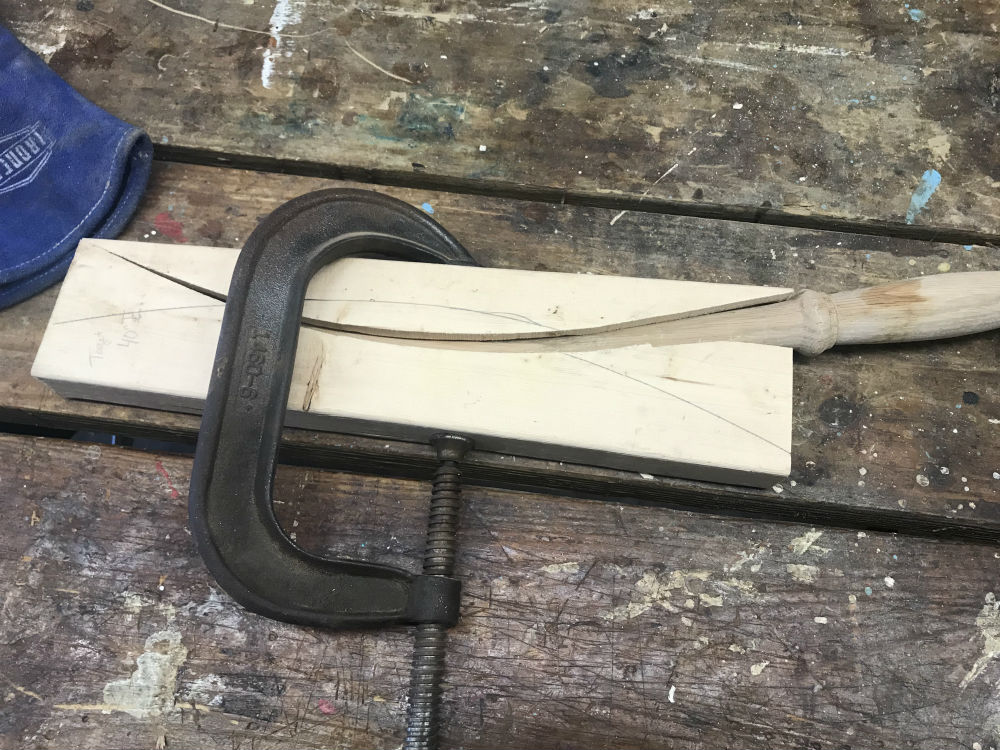
The next step in this project is to prepare the form for bending. Using a simple, knot-free
2 X 4 section (or other spare block of wood) about 16", use the bandsaw to create a pleasing curve (this is
more or less dramatic depending on the turner's desire) and carve a groove down the
center of both sides. This will help the steam-heated blade stay in the form. This groove
needs to be about 1/4" deep and 3/8" wide without significant bumps that will distort the
hook's blade once clamped.
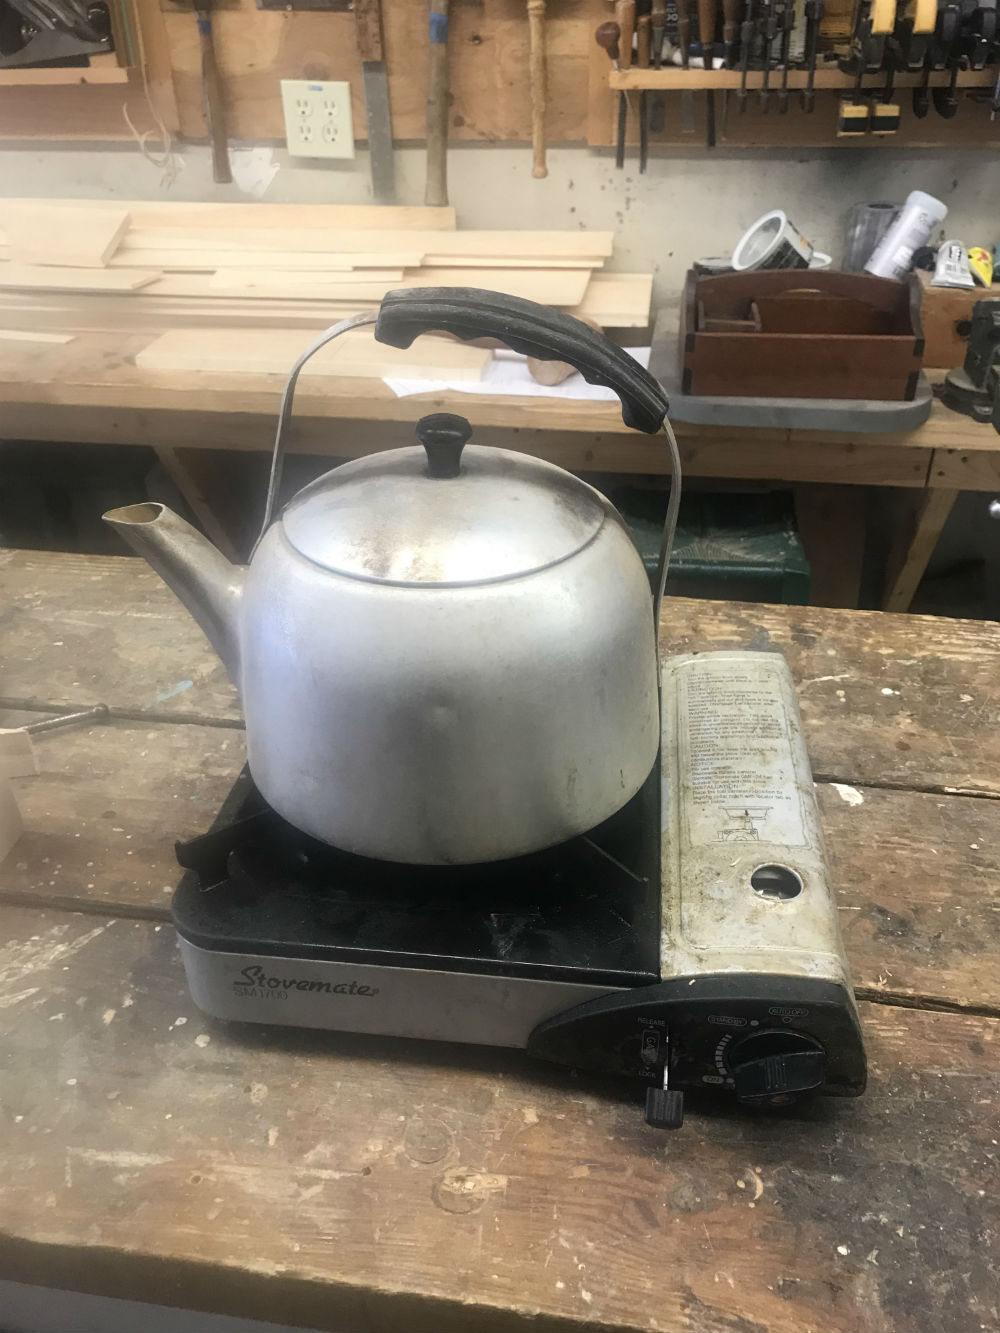
Steaming
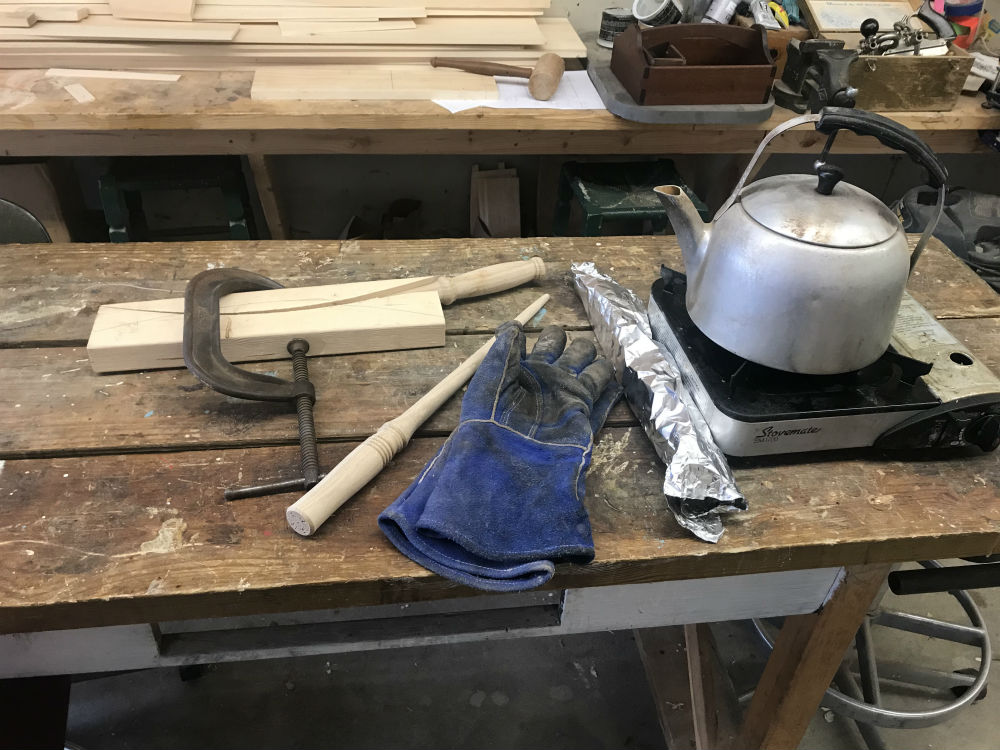
An old tea kettle and a steady heat source, like this propane camp stove to keep the water boiling is about as simple a set-up as possible and avoids creating a "kitchen conflict" elsewhere in the home.
Fill the tea kettle and bring the water to a full boil.
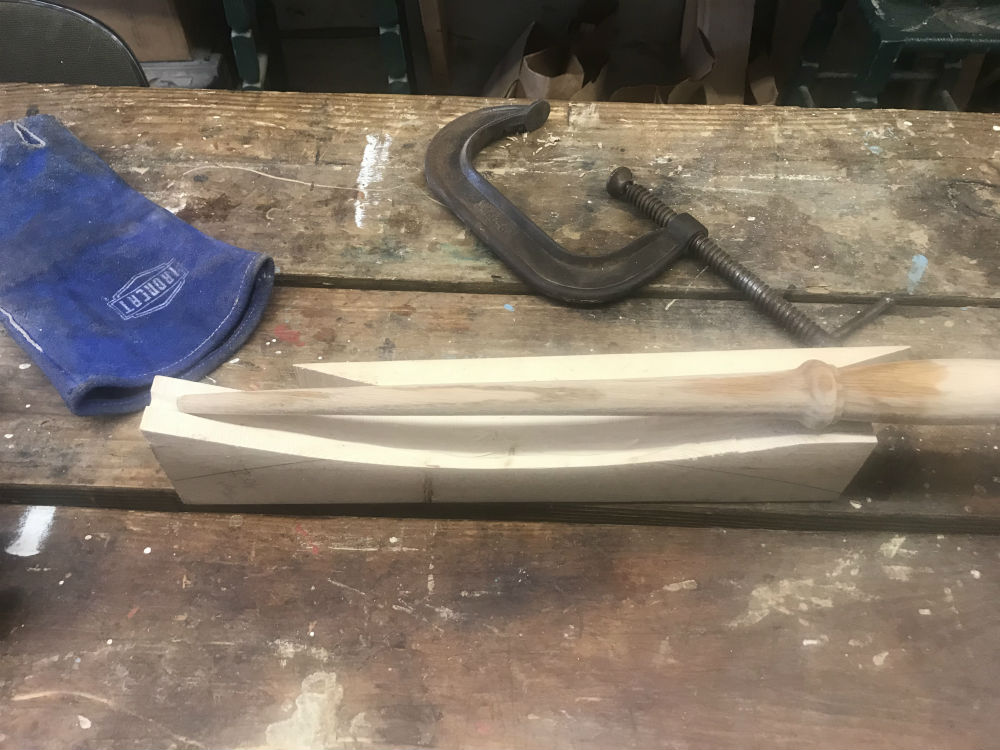
Borrowing a high-quality oven-mitt or a heat-resistant glove from the outdoor grill will
complete the safety protection. Be sure to have a strong clamp that will open large
enough to fit the new form when the straight blade is in it so that once steamed it will be
easy to close the clamp to bend it.
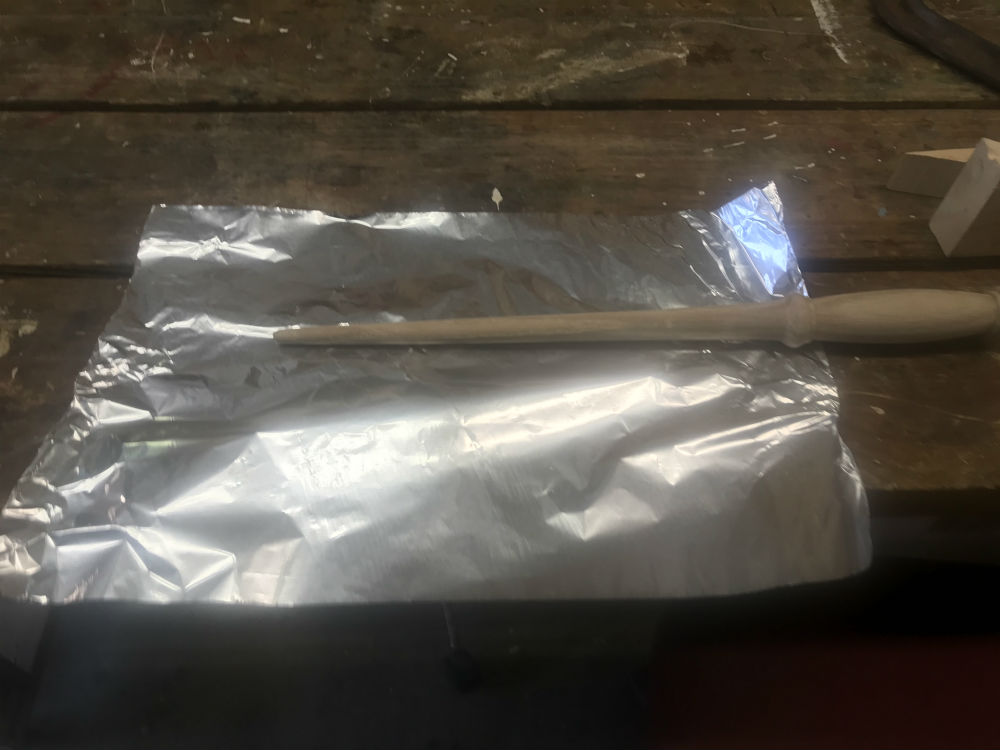
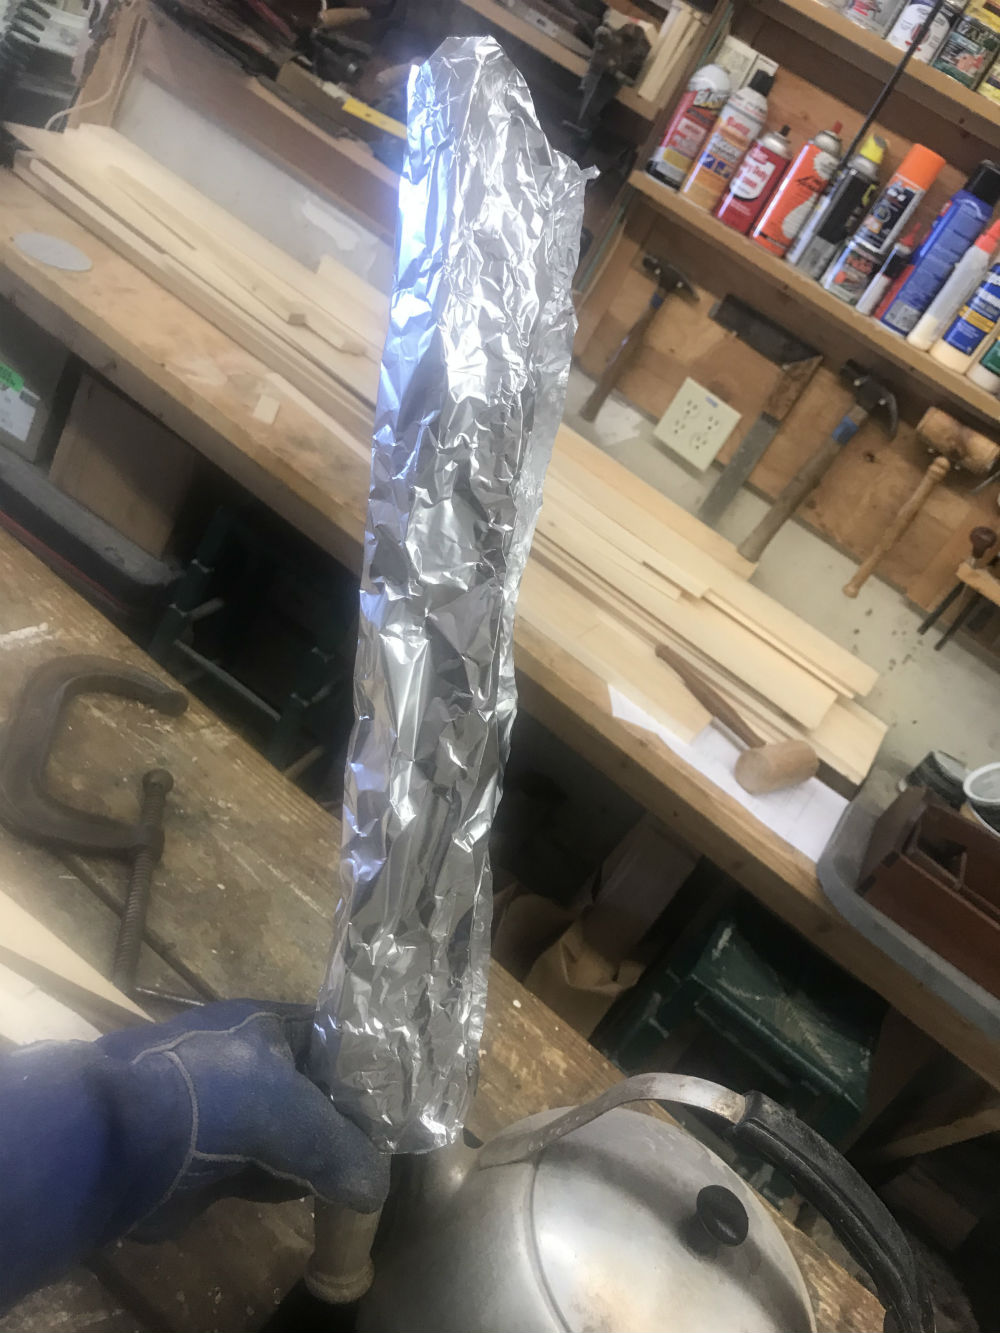
A section of tin foil (tin foil and wax paper should be part of every shop's inventory of
supplies), wrapped loosely around the blade of the hook, leaving plenty of internal space
for the steam to fully encompass the oak blade, will make this work efficiently.
With the gloved/mitt hand holding the wrapped hook by the handle slightly upright with
the kettle spout aimed into the bottom of the tin foil, and leaving a small opening in the
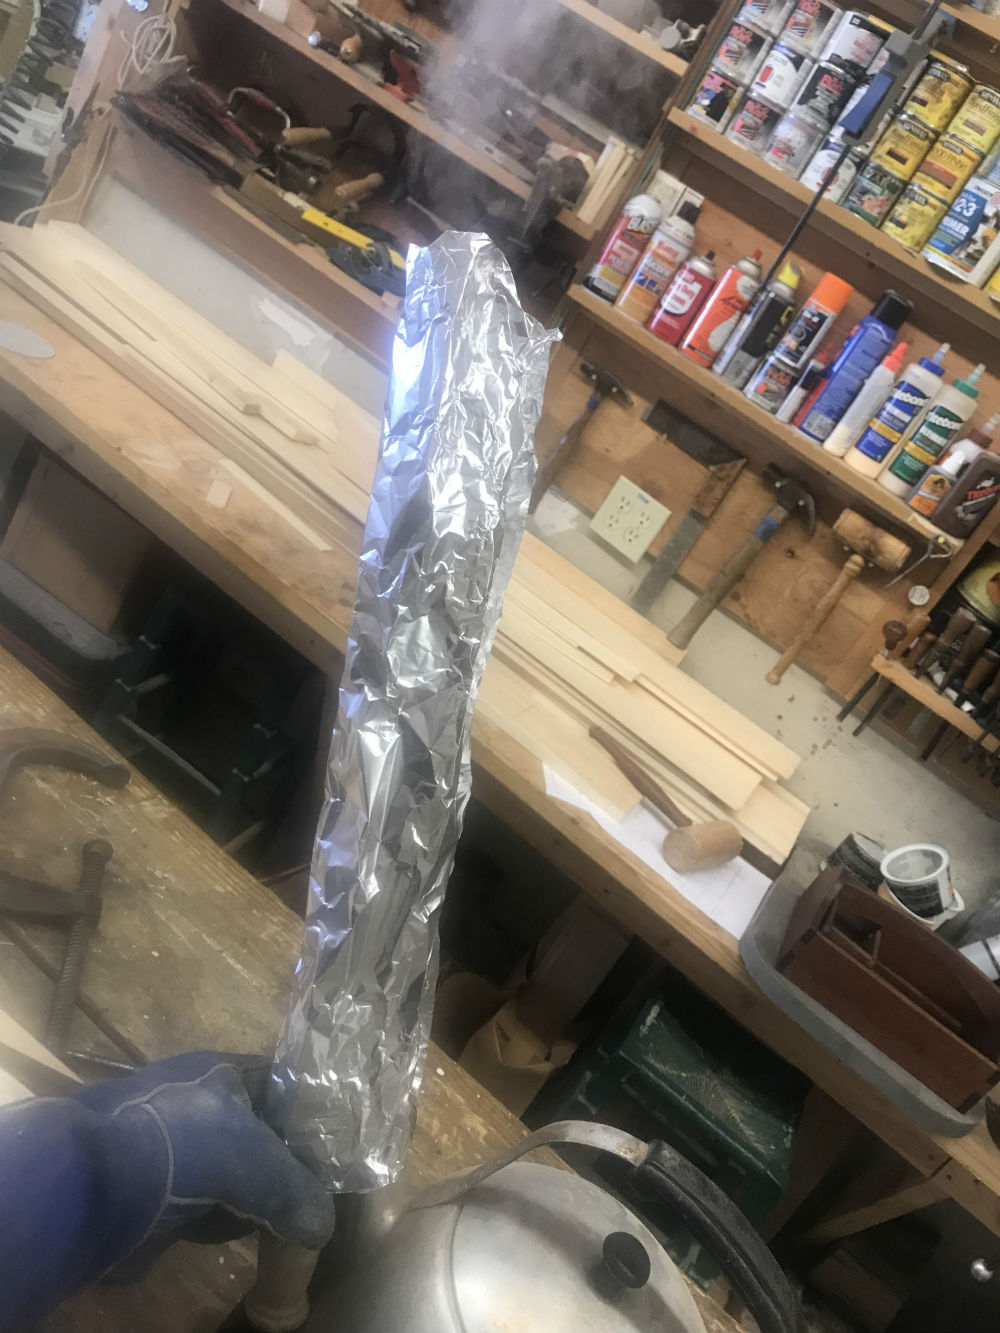
top of the tin foil, let the spout's steam fully heat the blade for about ten or more minutes.
Given the thinness of the blade and the heat of the steam, a full ten minutes should be adequate. Using different wood than oak may require a longer steaming time.
At the end of steaming, move fairly quickly to place the heated hook into the form and tighten the clamp fully.
Be sure the blade is evenly placed in the form.
Turn off the boiling kettle water and allow the clamped formed hook to cool under clamped pressure for a couple of hours or more, even over night.
The longer cooling time will reduce "spring-back" once the hook is released from the bending form.
Hand sand the entire hook and apply a food-safe finish like walnut oil or similar.
Ultimately the oil used to cook the donuts will fully impregnate the hook and give it a quality, historically accurate sheen.
Imagine the delicious donuts soon to be fetched out from cooking at just the right time and how much the cook will appreciate your efforts to keep their hands safely away from the hot oil and dripping fresh donuts.
Article Recommendation: The
Highland Woodturner Archive
includes a broad array of excellent articles dedicated to woodturning and woodturned projects that you might find interesting.
Click here to browse through Highland Woodworking's Woodturning department
Located in Castine, Maine, Highlands Woodturning gallery and shop offers woodturning classes and shop time, a gallery of woodturned art, custom woodturning for repairs, renovations, and architectural installations. You can email Temple at
temple@highlandswoodturning.com
. Take a look at Temple's Website at
http://www.highlandswoodturning.com/
Return to the
Wood News Online
front page
|