|
Click on any picture to see a larger version.
Turning the Corner
focuses on using woodturning on the lathe as a way of enhancing cabinetry, furniture designs, and architectural installations. Each article also suggests an important woodworking book to read, reread or listen to, and a link to an appropriate article in
The Highland Woodturner
. Along the way, these articles seek to inspire woodworkers (cabinetmakers, carpenters, and housewrights) to extend their skills into basic, novice, and advanced woodturning while discovering for themselves this particularly sensual and spiritually rewarding dimension of working with wood.
After more than three months of stay-at-home heath-safety confinement in the shop (a
more delightful than not restriction for woodworkers who frequently have to struggle to
carve out time in the shop) many of us have been able to make some of the shop
improvements, home improvements and advance gifting preparations...all of those
"do it later" projects that we have been thinking of, sometimes for years.
Similarly, one of my local friends, Hans Carlson, saw an opportunity to finally tackle the
new dining table he had dreamed of building for his family. He is an accomplished
hobby woodworker who has not yet been able to work on his turning skills for more than
an initial day's lesson at the lathe. After he was able to ship in the wood for his project to
his garage-shop, he asked me if I would be willing to have him come turn the legs that he
had designed and had already carefully mortised with his hand tools. His ultimate plan
was to build two tables, and he had acquired all the leg blanks plus extras for that
purpose.
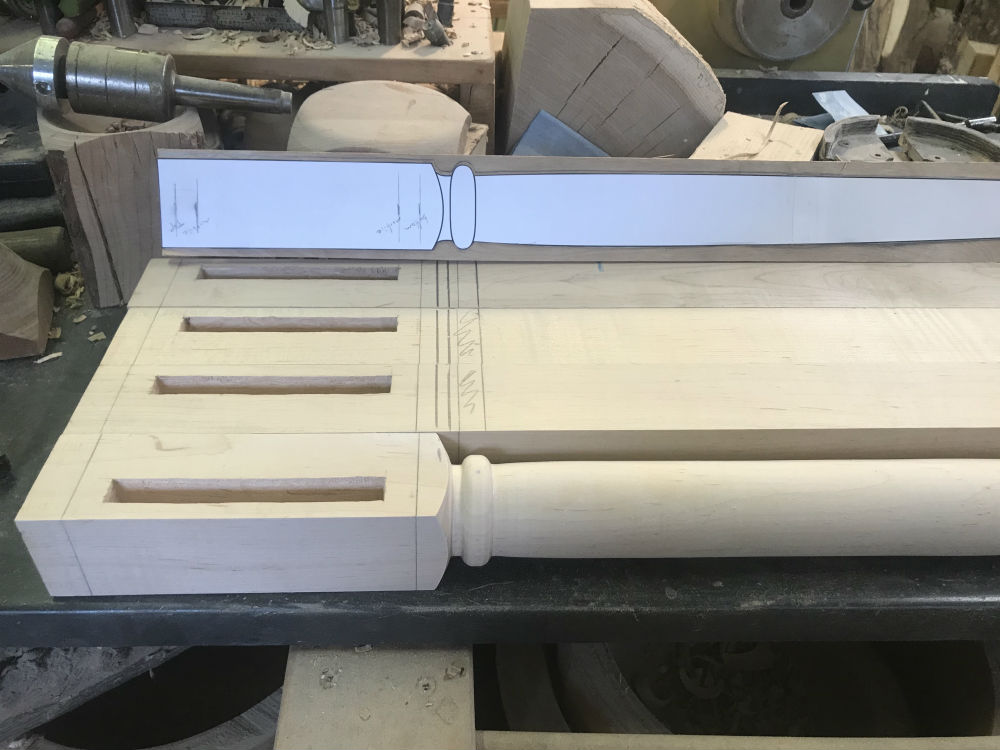
On the agreed upon cold, rainy day, he brought the leg blanks and his carefully drawn,
full-size scaled template to the shop for some physically distanced shop-time use of one
of my lathes. With a little guidance, he worked at the lathe for several hours trying to
shape and smooth one of the leg blanks, finding it far more frustrating and challenging
than he had anticipated.
|
In the course of our conversation about where he was finding it challenging and what he
really wanted to accomplish, he asked me to turn the four legs for the first table so he
could complete that project and fill the current need in his new home. Over time, he
wants to come back, practice his skills with the gouges and skew, and become skilled
enough to turn the legs for the second table which is to be a gift for a member of his
family.
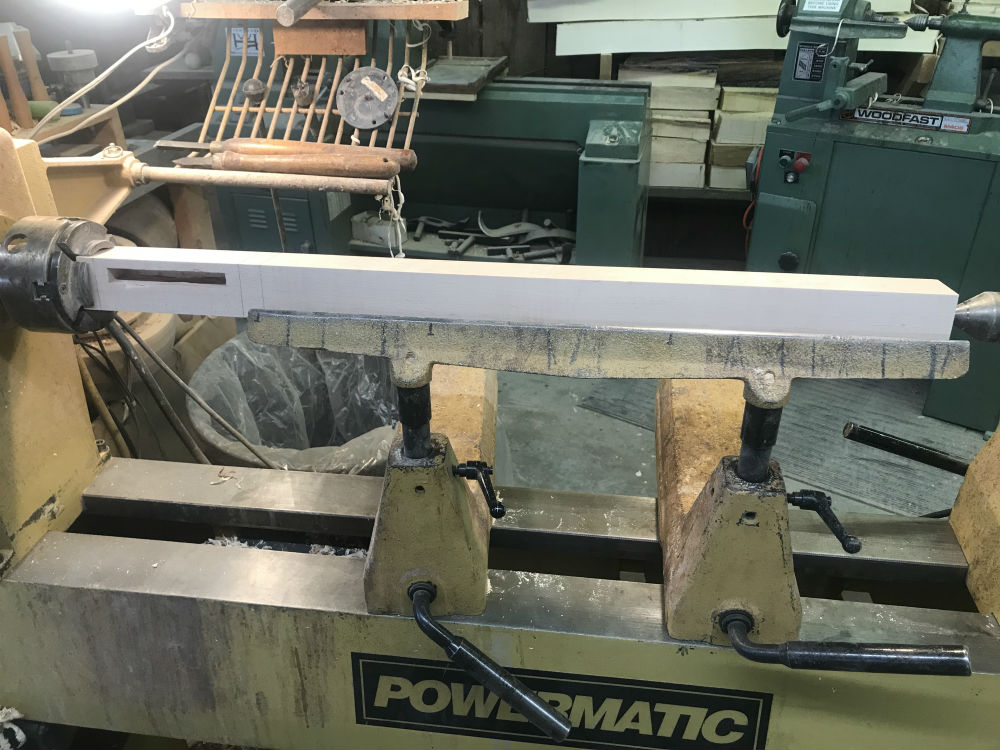
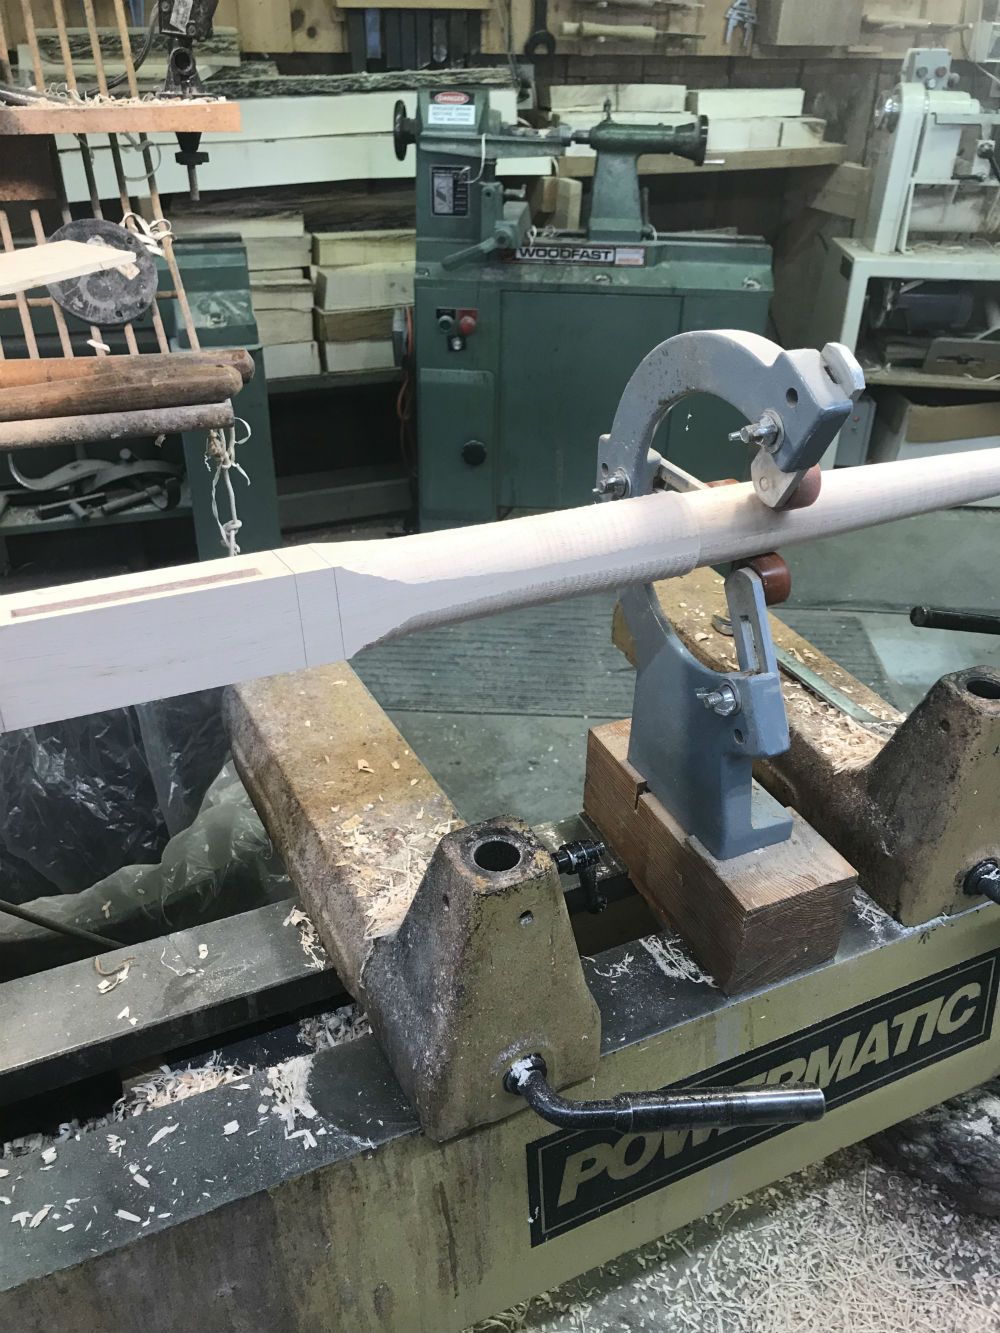
Turning four legs the same from a design template can be made easier by having a long
toolrest (note the twin banjos), using the extra support of a four-jaw, self-centering chuck,
and at the right time adding a mid-blank steady rest (pictured further below).

|
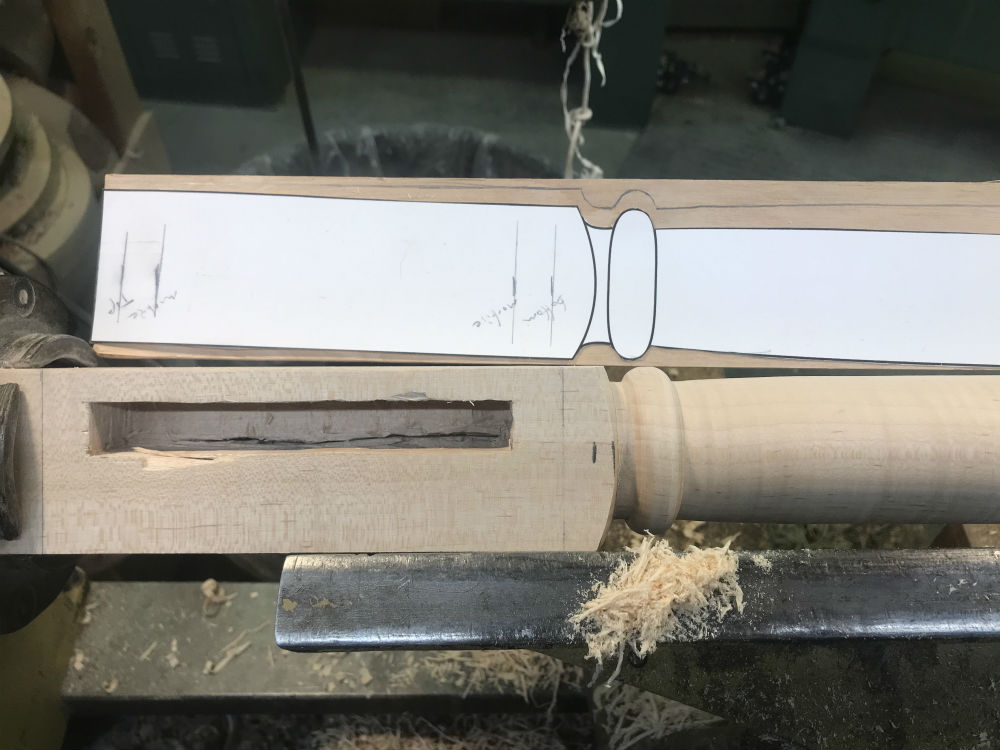
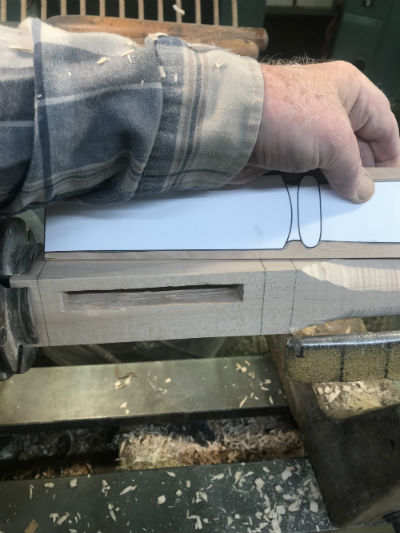
You'll want to identify the positioning of the square pommel and its decorative transition details.
|
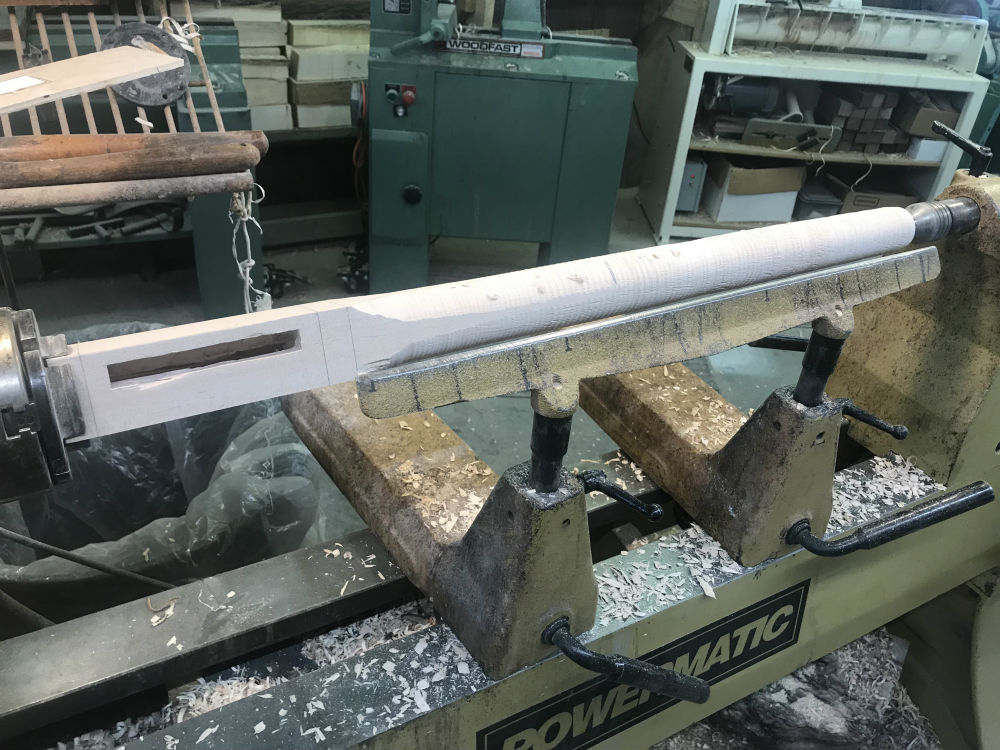
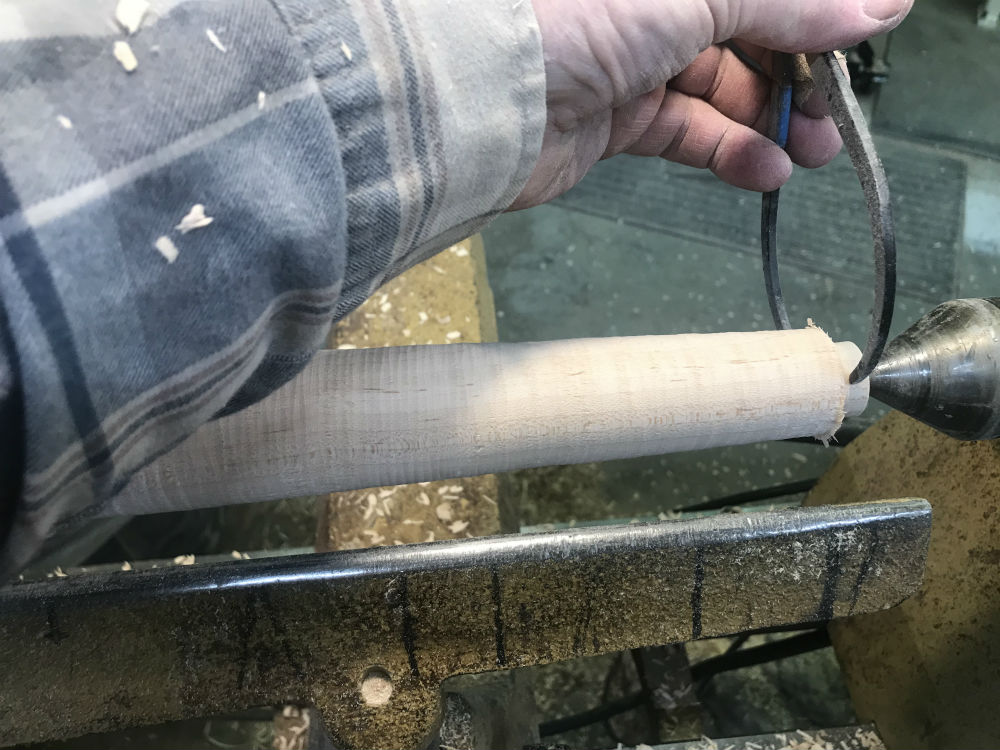
The next step is to round and then taper the leg. There are a
number of different ways
to achieve an even, smooth, attractive taper.
Tapers can be tricky, especially over a long, thinner length.
Size the smallest diameter at the bottom of the leg (in this design there is no bead or other lower decoration that if present would need to also be defined early).
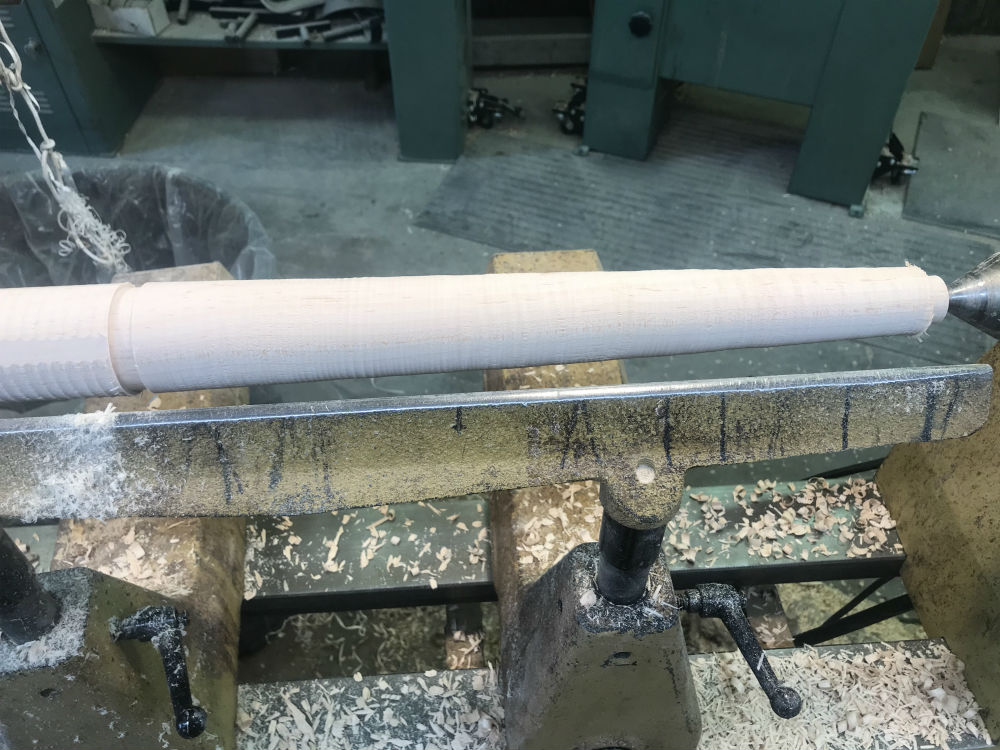
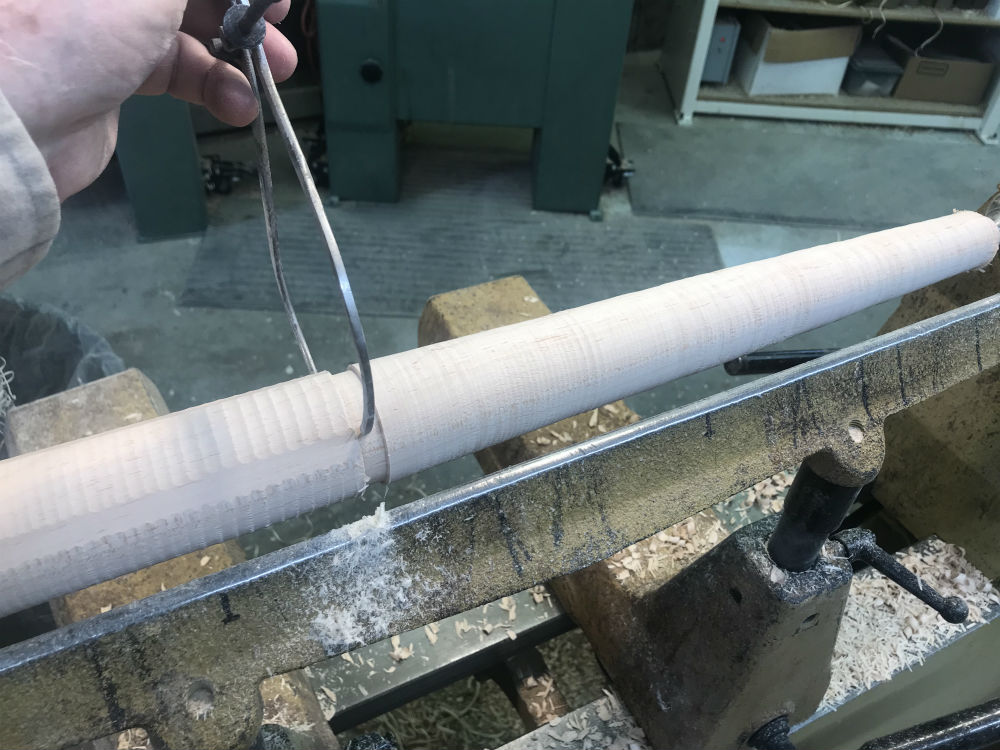
Sizing the upper diameter of the taper below the transition details, allows the leg to be
visually created. Too often turners cut away too much of what is needed, and one way to
fix this problem is to over-size the mid-point.
Next, install a steady rest to support the work which will eliminate destructive harmonic
vibration, and gives the turner an opportunity to proceed in a timely, safe way. Steady
rests can be made in the shop or purchased but should be accurately centered, adjustable,
and easily mounted and dismounted on the lathe.
The turner might use a long straight section of a story-stick, a straight-edge, or any straight-line measuring tool to check and adjust the smoothing skew cuts as the tapered leg
reaches its final dimension. Once the section below (first) and above (second) the steady
rest, are complete, leave the steady in place to complete the transition details, in this case
a simple square-to-round transition with a bead.
The critical measurement at this point, more important than the top or bottom of the leg,
is the bottom of the mortice. The first turned leg with its mortice as a benchmark guide
becomes a story-stick for marking the other three legs to be turned.
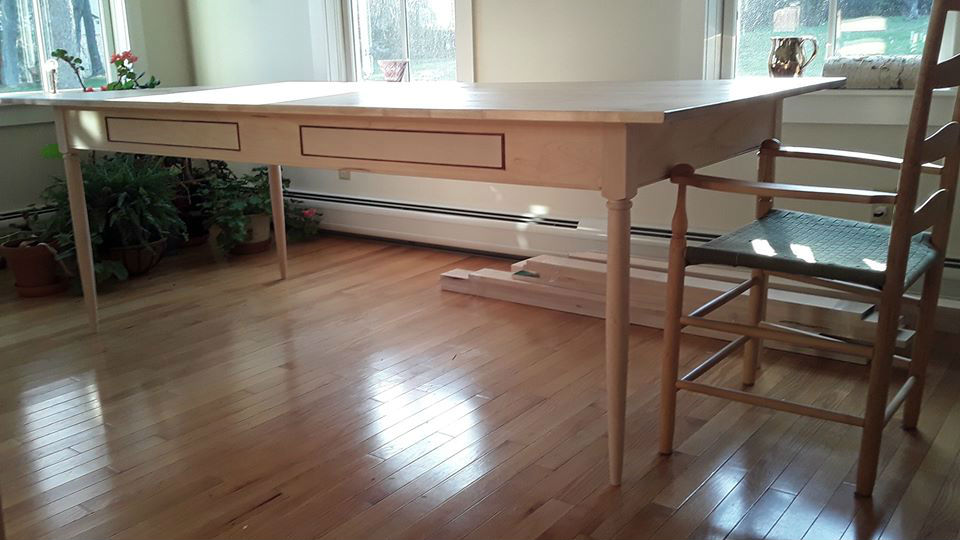
Turned and delivered, my friend was happy to have the time to complete his beautiful
table, now already in use.
Using a Jet mini-lathe I am able to lend him for his garage shop while I am not holding
classes, he is already at work mastering the challenging skills of transitioning from
square-to-round, beading, and tapering to sizes while using the gouges, beading/parting
tool, and almighty skew! His next table will sport legs that he has turned on his own, a
proud accomplishment that benefits from the enforced time alone in the shop.
More Woodturning Articles:
The
Highland Woodturner Archive
includes a broad array of excellent articles dedicated to woodturning and woodturned projects that you might find interesting.
Click here to browse through Highland Woodworking's Woodturning department
Located in Castine, Maine, Highlands Woodturning gallery and shop offers woodturning classes and shop time, a gallery of woodturned art, custom woodturning for repairs, renovations, and architectural installations. You can email Temple at
temple@highlandswoodturning.com
. Take a look at Temple's Website at
http://www.highlandswoodturning.com/
Return to the
Wood News Online
front page
|