|
|
|
|
Woodturning a Peg Decorated Bowl
By Rick Morris
Duluth, GA
|
|
|

|
|
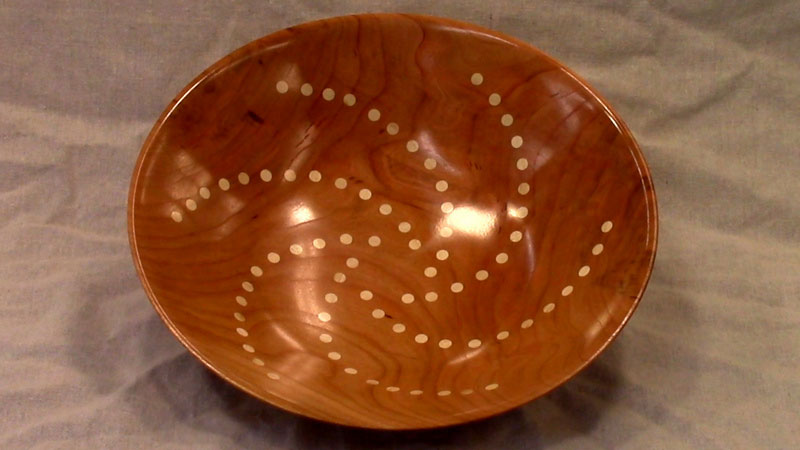
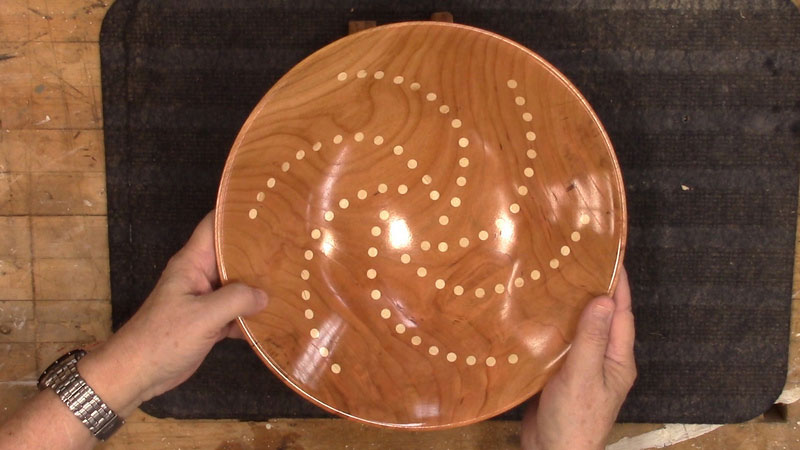
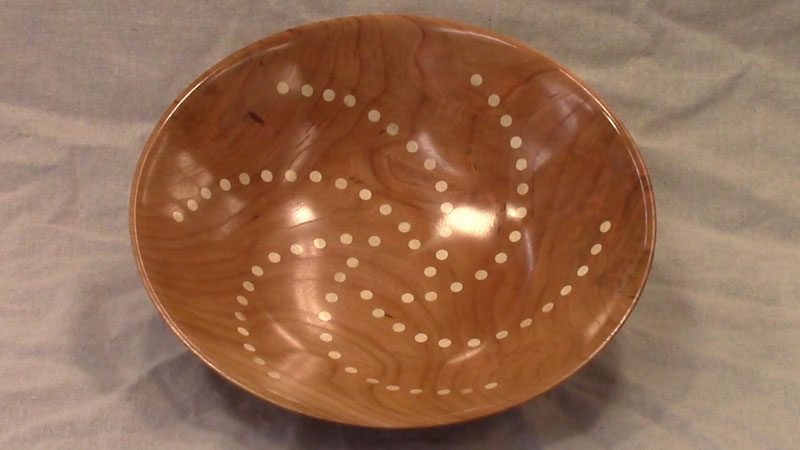
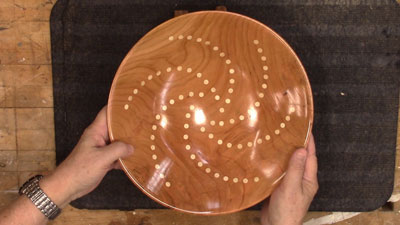
Figure 1 - The finished bowl
|
I recently made a bowl for a friend who had given me some cherry logs, and I decided to make it a little more special by using wooden pegs to decorate it. I have made a number of peg-decorated bowls over the years, and find it really adds some interest to an otherwise plain wood bowl.
For this article, I'm skipping the initial turning of the bowl, as the focus is really on the peg decoration. I'm starting with the bowl blank after it has been rough-turned and dried.

|
|
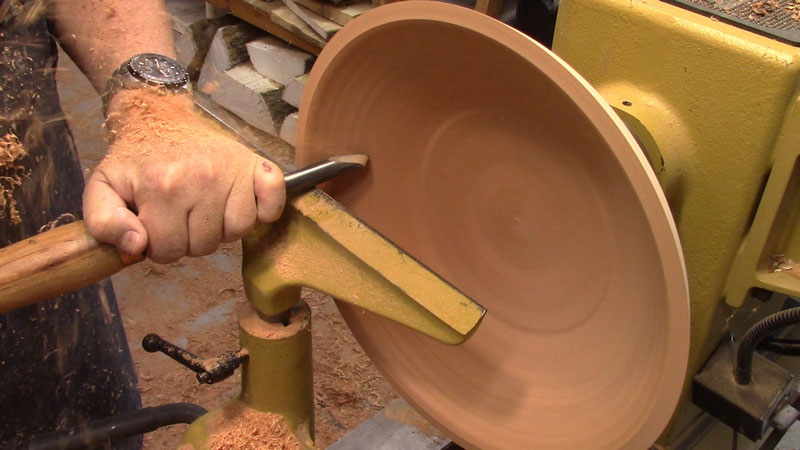
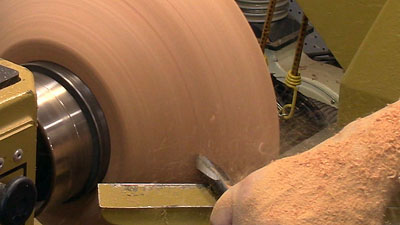
Figure 2 - The rough-turned bowl blank
|
The first step is to bring the bowl back into round. As it dried out, it warped. Surprisingly, it did not warp a great deal, but it did shrink about 1/4" across the grain, not much for a 13" diameter bowl.
|
|
Figure 3 - Turning the outside of the dried blank down to round…
|

|
|
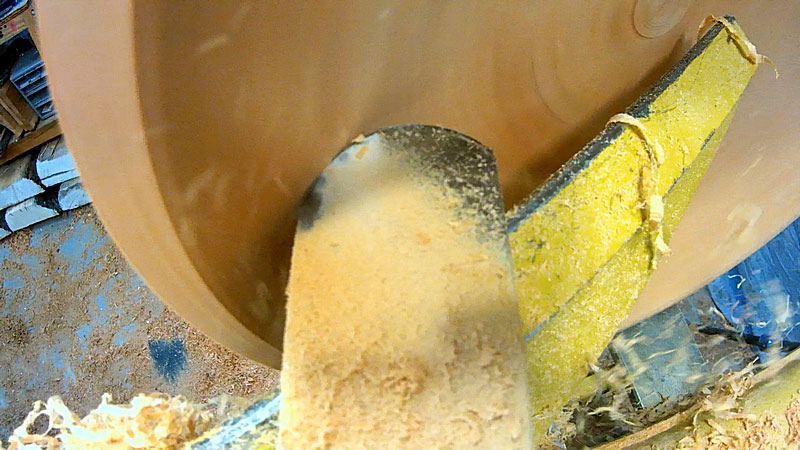
Figure 4 - …and turning the inside down to round
|
With the bowl back in round, my next step is to turn the interior to a thickness of 1/2" to 3/8". I don't want to thin it down too much, because I have to tap the pegs in place, and I don't want to crack the bowl doing that.

|
|
Figure 5 - Turning the bowl to a thickness of about 3/8"
|
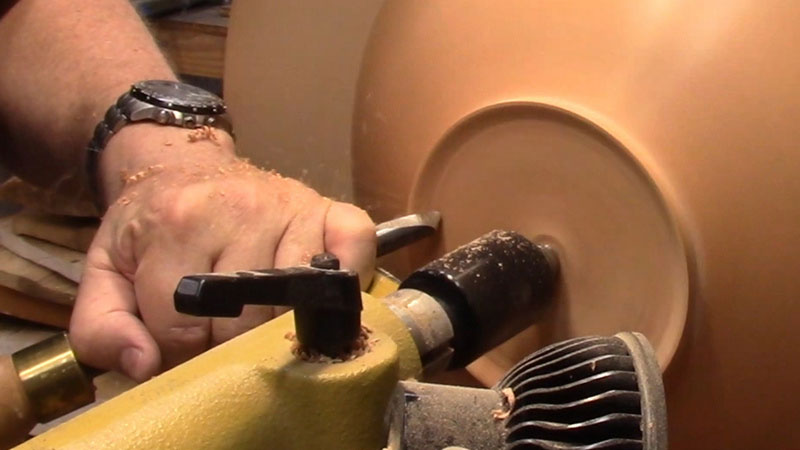
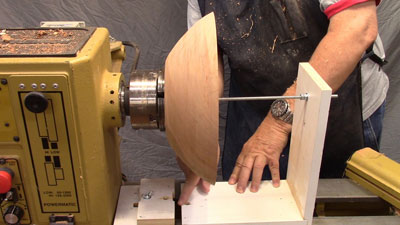
I don't feel like turning a funnel today (which I'm somewhat prone to do), so I stop to check the bottom thickness. This homemade bottom-thickness jig is easily made from some scraps of wood and a threaded rod. After adjusting the jig for the particular chuck and jaws I'm using, the bottom thickness is reflected in the gap between the two wood pieces on the lathe bed.
|
|
Figure 6 - Turning the bowl to a thickness of about 3/8"
|
The bottom is the right thickness, so I stop working on it, and lightly use a scraper to refine the sides of the bowl.

|
|
Figure 7 - Cleaning up the inside walls
|
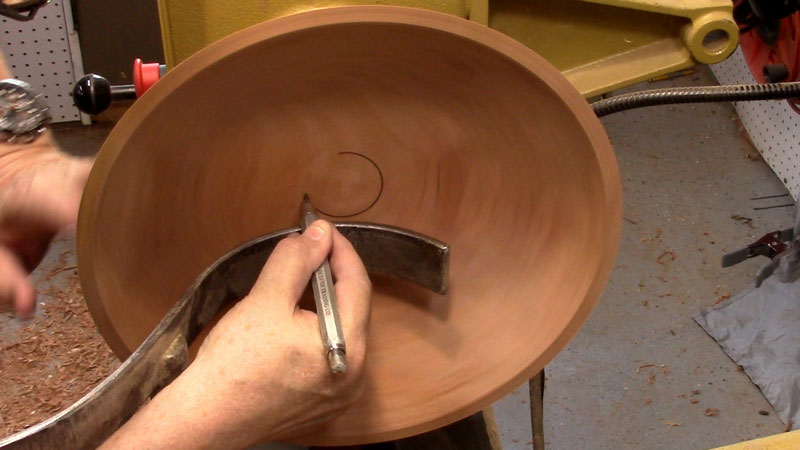
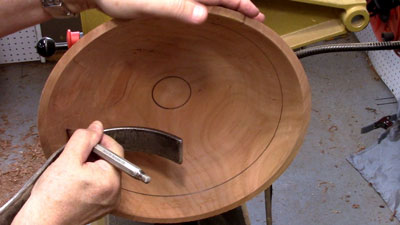
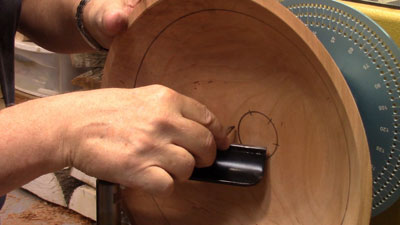
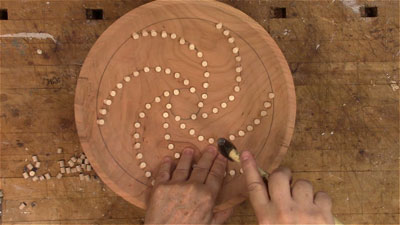
The turning is complete, at least for the moment. I'm going to put pegs into the interior of the bowl, in a spiral pattern. My first step is to draw a circle in the middle to start the pattern.

|
|
Figure 8 - Starting the peg pattern with a center circle
|
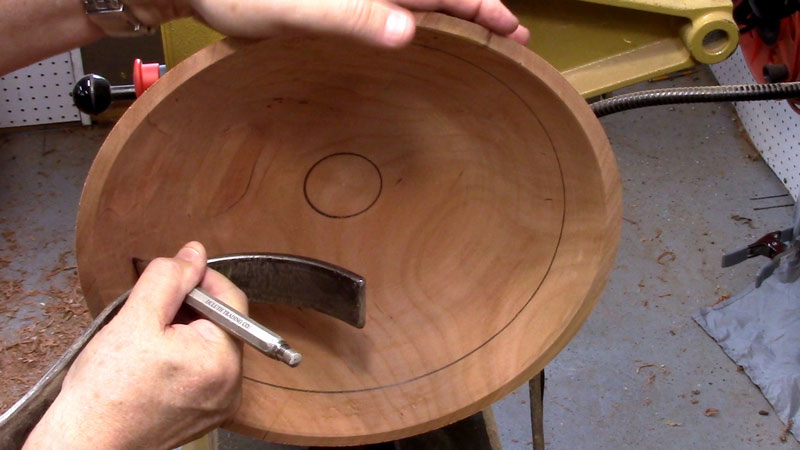
Then I draw another circle near the rim. This sets the end point of the spiral arm.
|
|
Figure 9 - A circle near the rim will be the outer point of the spiral
|
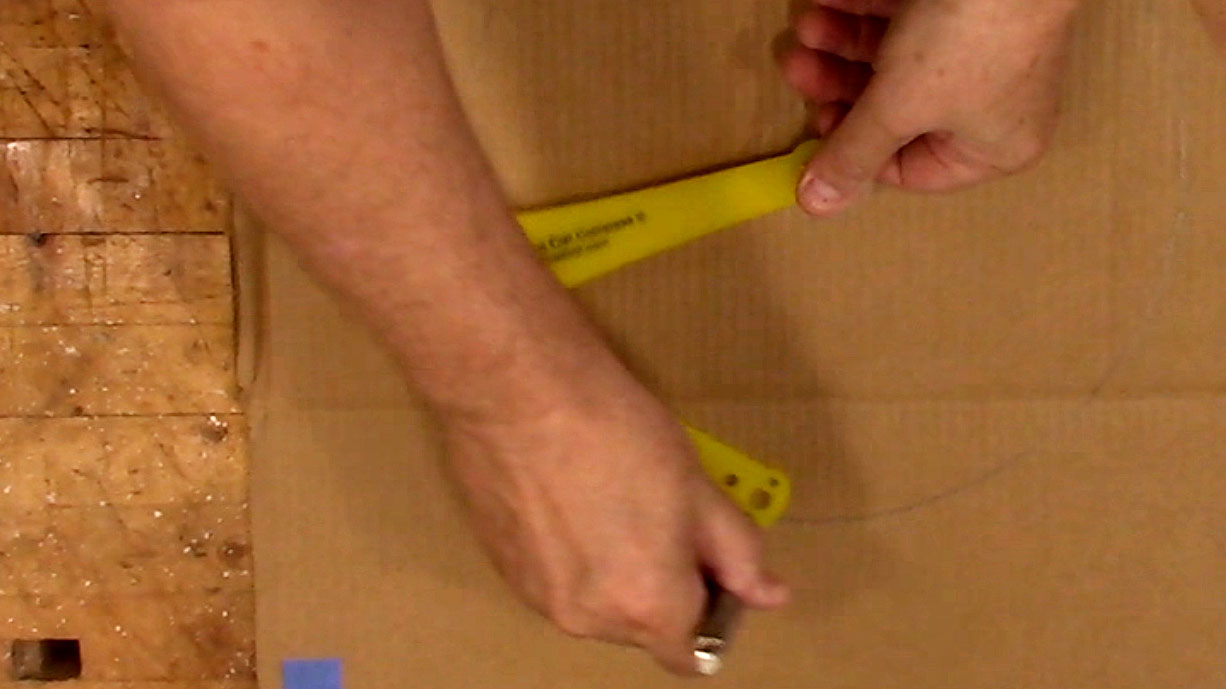
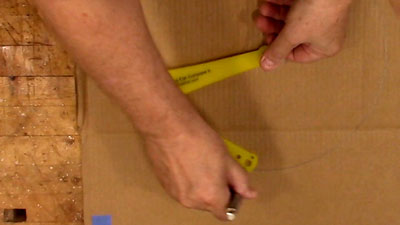
Now it's back to the workbench. I need to make a spiral arm pattern on some cardboard. I start with a diameter the same as that of the outer line inside the bowl. I also draw a center circle the size of that in the bowl.
|
|
Figure 10 - I'm using a cardboard box to make the pattern
|
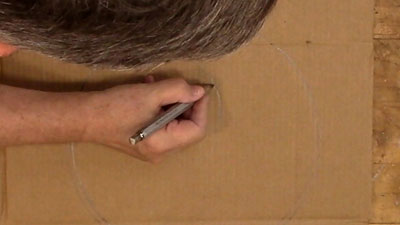
I freehand a spiraling line from the inner circle to the outer circle.
|
Figure 11 - The spiral from the center circle to the outer
will be the pattern
|
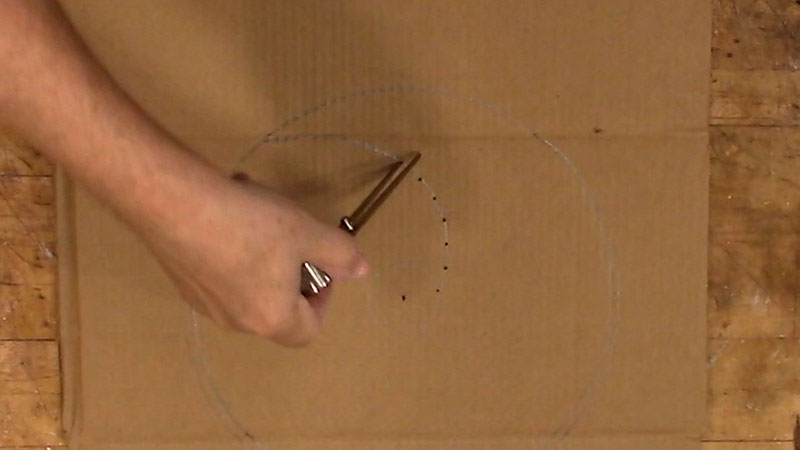
Now I set my dividers so that I'll have about 5/8" between peg points on the spiral, and mark them out, starting at the inner circle.

|
|
Figure 12 - Each point will be the center of a hole for the peg
|
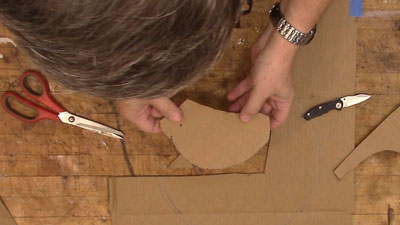
To finish my pattern, I cut along the spiral I just drew, and then cut that piece of cardboard free of the cardboard sheet.
|
|
Figure 13 - The spiral is along the bottom of the cut piece
|
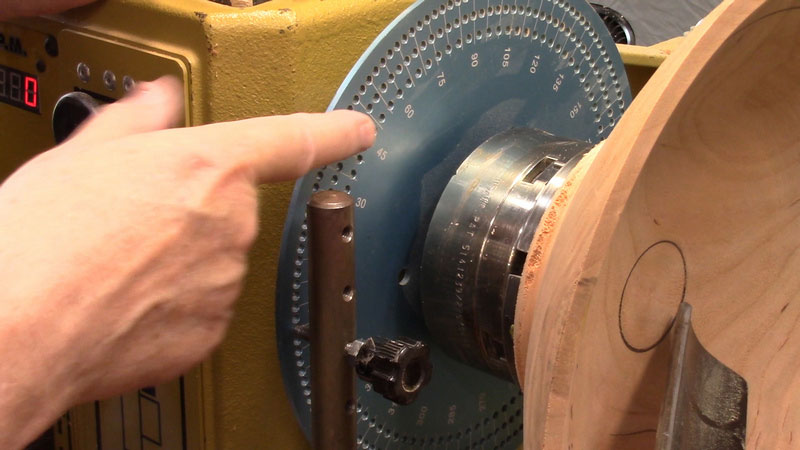
To mark the positions where I will use the cardboard template, I use an indexing plate mounted behind my chuck.

|
|
Figure 14 - This indexing wheel will go down as far as 5 degrees
|
I mark six starting points around the inner circle – a mark every 60 degrees.
|
|
Figure 15 - I mark out start points for six spiral arms
|
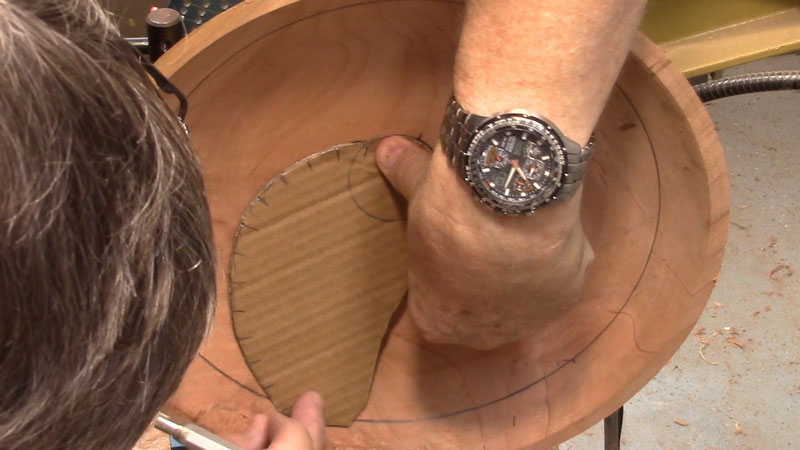
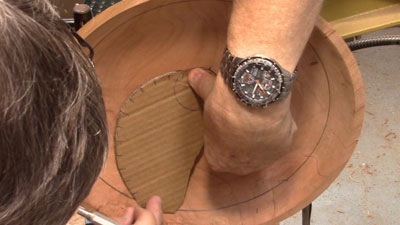
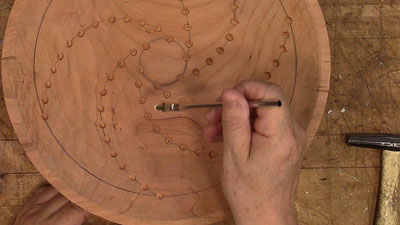
Now I position the pattern inside the bowl, with the innermost point on the inside circle and the outermost point falling on the outer circle.
|
|
Figure 16 - Setting the pattern, from the inner circle to the outer circle
|
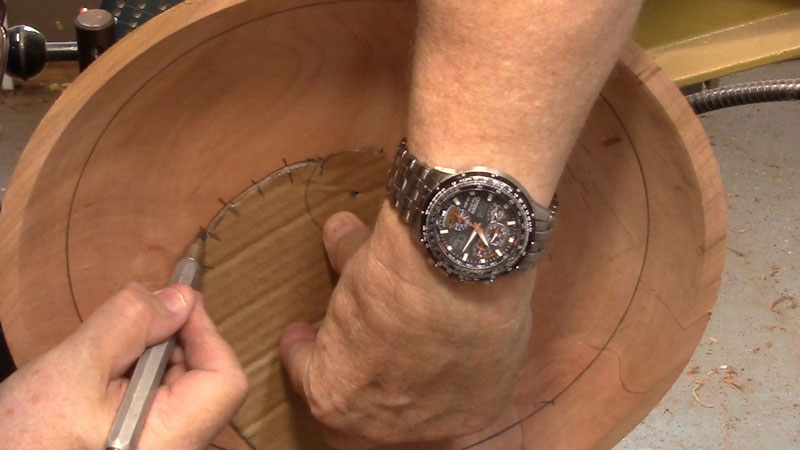
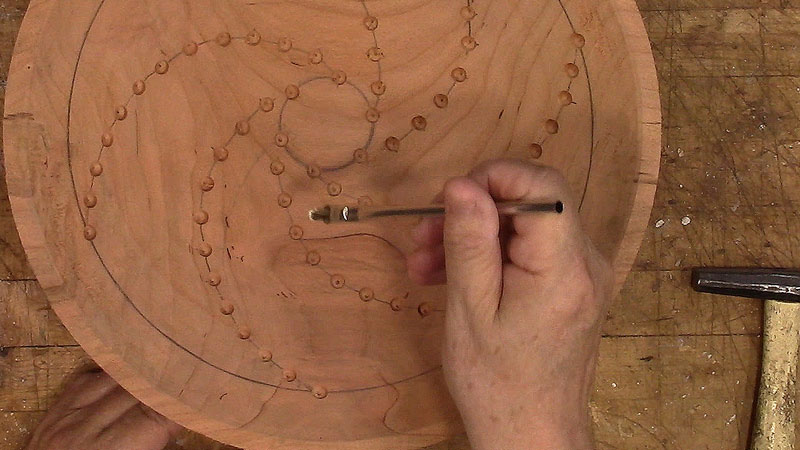
While holding the pattern firmly in place, I mark off the peg points from the pattern.

|
|
Figure 17 - Each mark on the bowl will get a hole
|
|
|
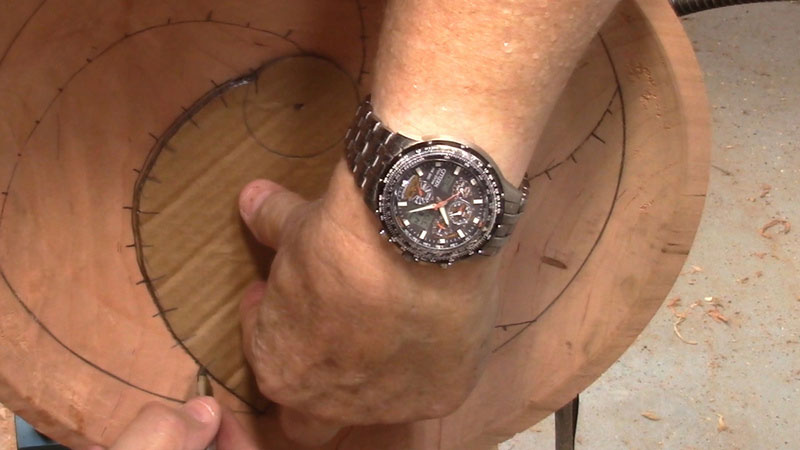
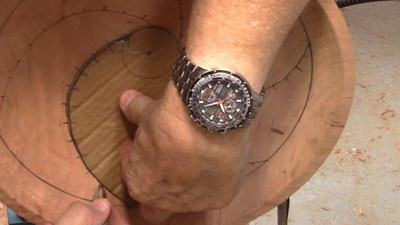
Figure 18 - The pattern is drawn six times around the bowl
|
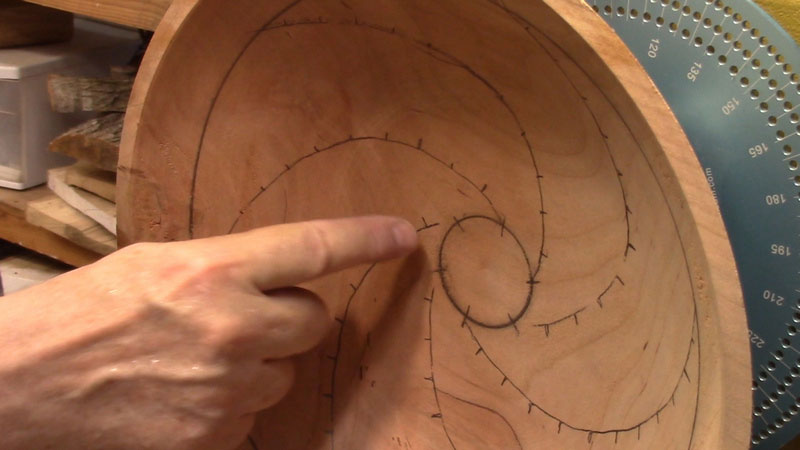
And then I carefully count the number of spirals. It may sound silly, but I've made silly counting mistakes before!

|
|
Figure 19 - I count the spiral to ensure I've done it right
|
Now it's back to the workbench to drill a herd of holes in the bowl. I prefer 5/16" diameter pegs. I use a
Forstner Bit
to drill the holes because it leaves a much cleaner outer rim of the hole. A standard twist bit usually leaves a ragged rim, and that will show when the bowl is finished.
|
|
Figure 20 - A 5/16" Forstner Bit
|
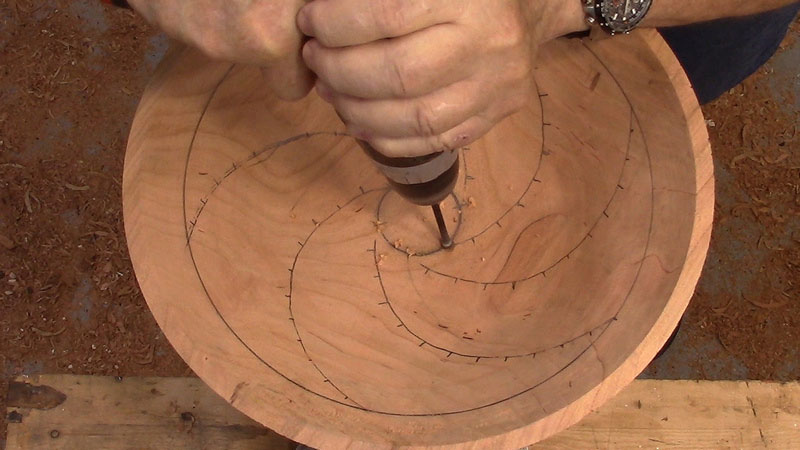
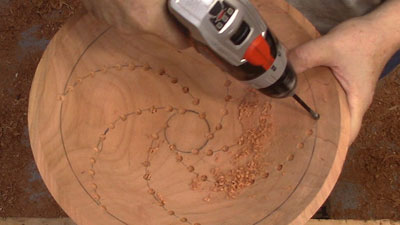
The drilling commences! The depth I drill is 1/4". Obviously, I can't go too deep, or I'd go all the way through the sidewall of the bowl (I only want the pegs to show on the bowl's interior).

|
Figure 21 - Drilling the first hole, 1/4" deep on the previously
marked points…
|
|
|
Figure 22 - ...and drilling the last hole
|
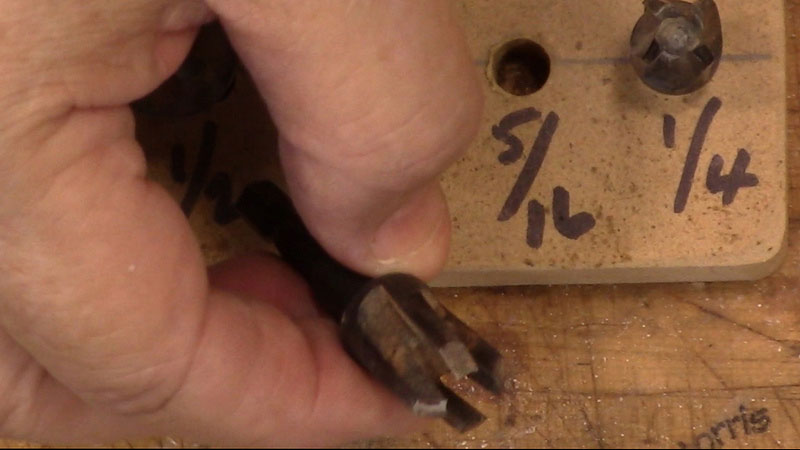
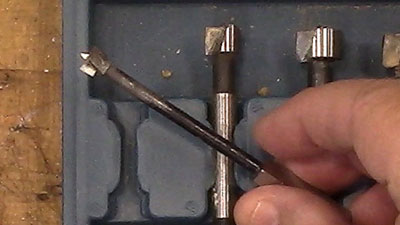
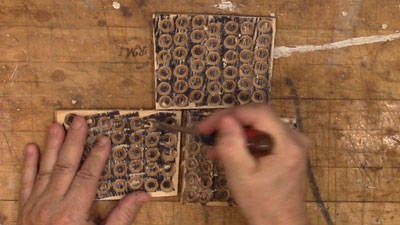
All of these holes need pegs. I make my pegs with a
Plug Cutter
. Dowel rods from the hardware store are generally not a good fit for their stated size and are frequently warped in cross-section. I'm using a 5/16" plug cutter (makes sense, right? A 5/16" plug cutter to match a 5/16" hole).
The type of plug cutter I use is one with four “legs" on it. I've found this type cuts better than the types with a circular cross-section. More importantly, it cuts the plug with a very slight taper. Tapered pegs are much easier to put into the holes drilled in the bowl bottom.

|
|
Figure 23 - A 5/16" plug cutter
|
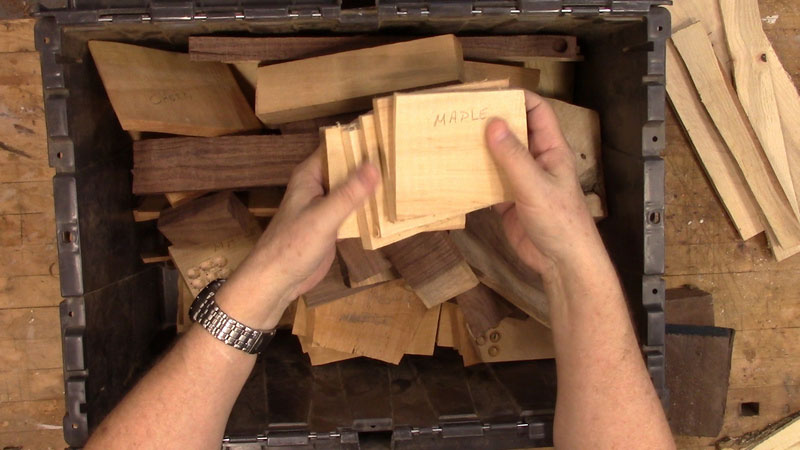
I save my wood scraps just for the purpose of making pegs. From my scrap bin, I pull out several flat pieces of maple. Its light color will show up nicely against the cherry bowl.

|
|
Figure 24 - Making pegged bowls is a good reason to save scraps
|
Before I start cutting pegs at the drill press, I darken the upper surface of the wood with a marker. The upper surface will have a slightly smaller diameter than the lower end of the cut peg, because the plug cutter is slightly tapered. It's a very slight difference in diameter, hard to see with the naked eye, so marking the small end makes it easy to find.
I want the smaller end to go into the hole, not the larger end. That ensures a snug fit at the visible end of the peg.
|
Figure 25 - Marking the peg blank to make it easy to identify the
small end of the peg after it's cut
|
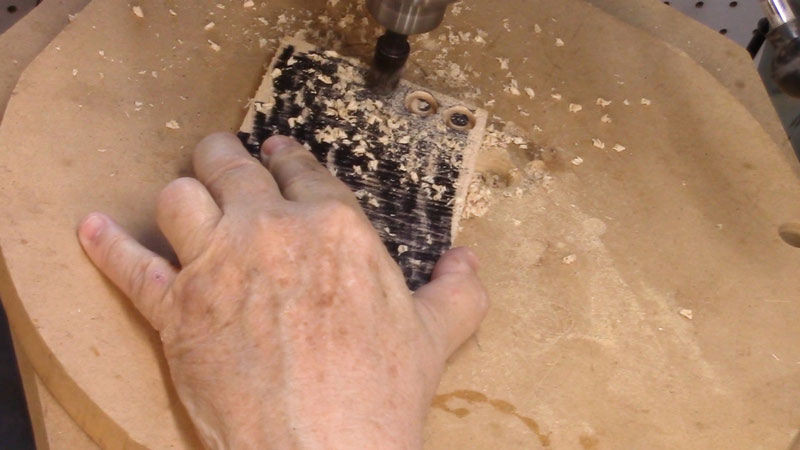
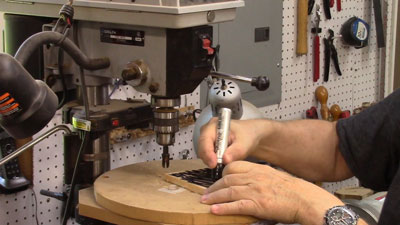
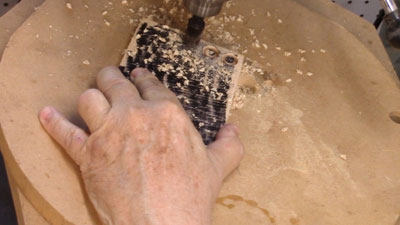
The peg-cutting goes fairly quickly, which is good, because I've got a lot of pegs to cut. I don't cut all the way through the maple piece. I could do that, of course, but that takes more time, as each peg then has to be pried out of the plug cutter.
|
|
Figure 26 - The pegs are cut on the drill press
|
I need 78 pegs for this bowl. In the excitement of the moment, I've cut slightly over a hundred. This allows for breakage when prying the pegs out of the wood, for dropping some on the floor and losing them, for having some break during insertion and/or when trimming them down, and, of course, for snacking. I use a screwdriver to pry each peg free from the wood.
|
|
Figure 27 - A screwdriver is used to pry the pegs free
|
I use a small tack hammer and
regular woodworking glue
to put the pegs in the bowl. I don't use CA glue because sometimes the pegs go sideways when tapping them in, and I have to pull them out with pliers. So a slow-setting glue is preferable.
|
|
Figure 28 - Woodworking glue is best for pegging
|
I've tried various methods for getting the glue into the holes. Putting in too much glue will keep the peg from going it. I take a small acid brush and trim some bristles off each side, leaving a smaller tip. The glue needs to be brushed up against the sides of the hole, as well as the bottom.
|
|
Figure 29 - Each hole has to have glue
|
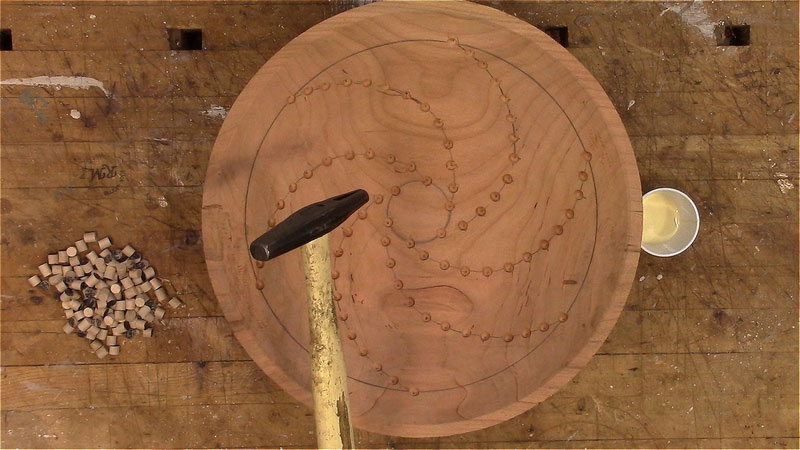
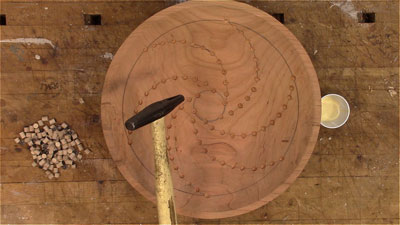
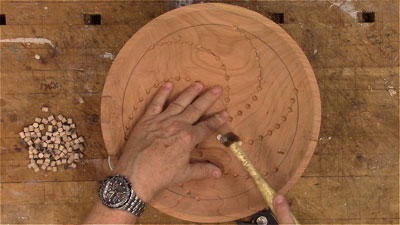
Tapping the peg in must be done somewhat gently, not only to put less stress on the bowl, but because a strong tap might push the peg in sideways, which is a nuisance. If the peg does go in sideways and get “hung" partially out of the hole, then I'll pull it out with pliers, and get a fresh peg.
|
|
Figure 30 - The peg is carefully tapped into the hole
|
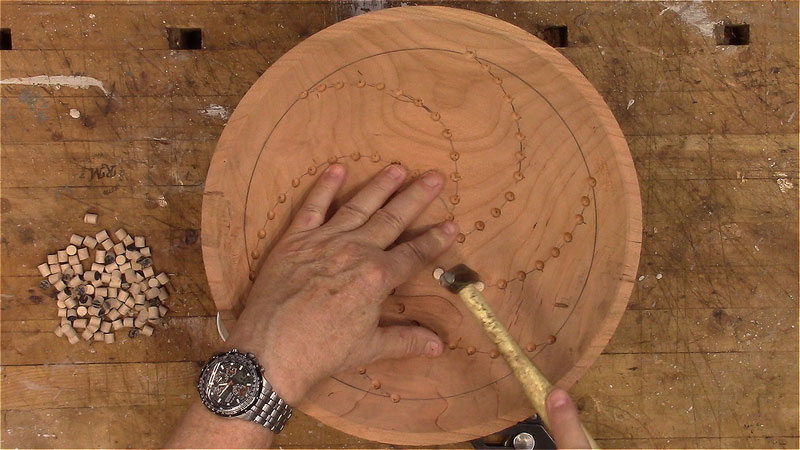
Working on the inside of a bowl, rather than the outside, presents a challenge in getting the hammer in position. In this case, I found that using a piece of wood as a “hammer extension" worked well.

|
|
Figure 31 - Tapping when the hammer isn't able to get to the peg easily
|
|
|
Figure 32 - The last peg is tapped in place
|
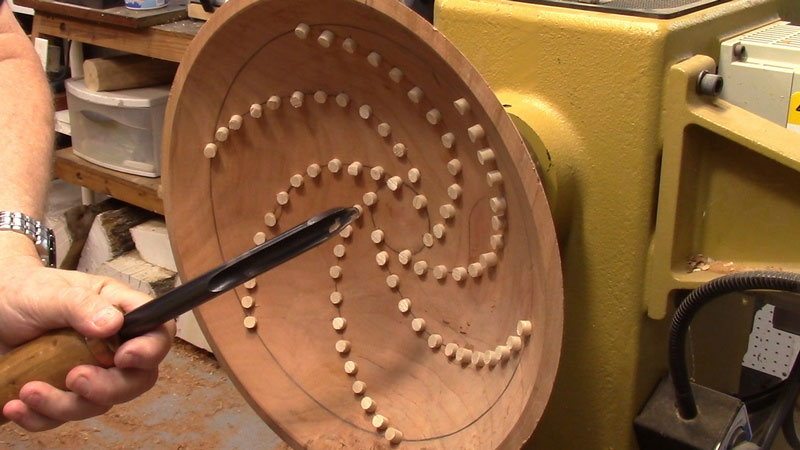
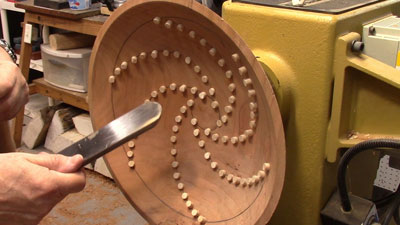
I mount the bowl back on the lathe. I need to cut the pegs flush with the surface of the bowl. I normally use a gouge or scraper for this, making cuts as delicately as possible. Even so, I'll usually have one or two pegs break off below the surface of the bowl. Then I have to drill the hole out again, and put in a new peg.

|
|
Figure 33 - A gouge can be used to trim the pegs flush...
|
|
|
Figure 34 - ...or a scraper can be used
|
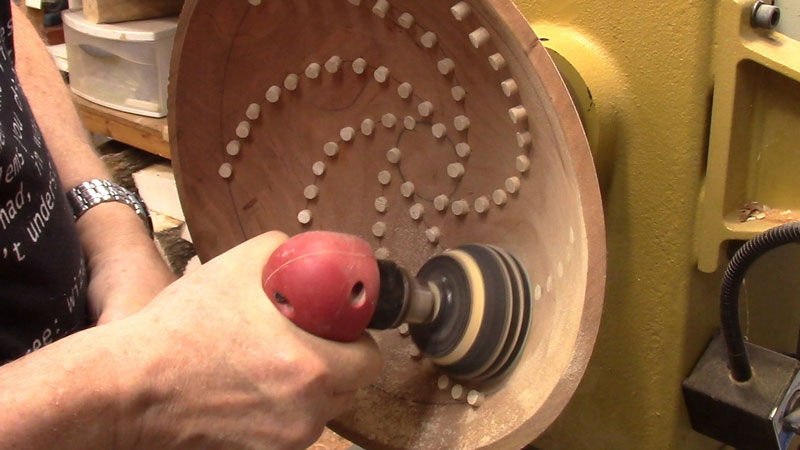
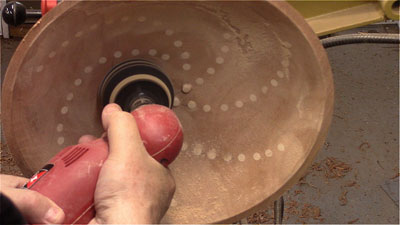
For this bowl, I decided to be wild and crazy, and I used my sanding drill, with a 150-grit disc.

|
|
Figure 35 - I level the pegs with a 150-grit sanding disc
|
Sanding the pegs down is a lot slower than cutting, but none of the pegs break, so I'm probably better off overall.
|
|
Figure 36 - Finishing sanding the pegs level with the bowl surface
|
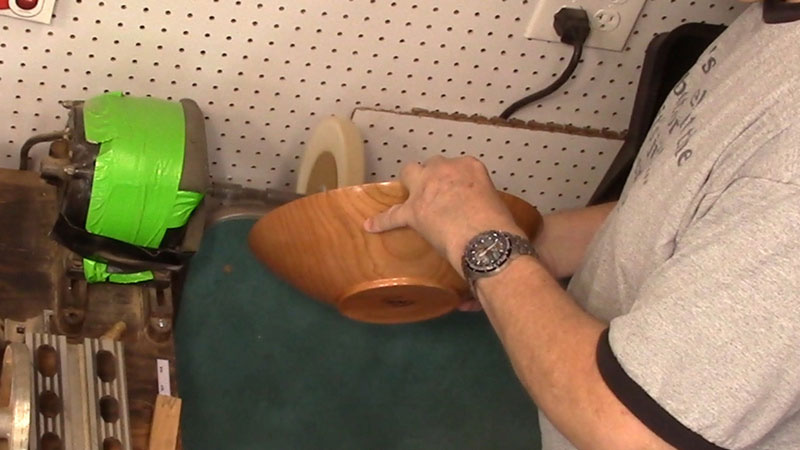
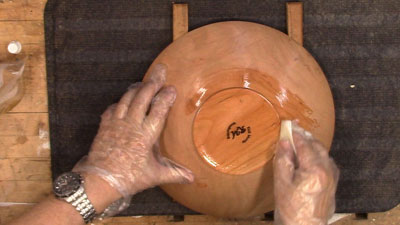
With the pegs done, I sand the bowl thoroughly on the inside and out, down to 1000-grit paper. Then I reverse the bowl onto a very large faceplate I made, and do the final shaping on the very bottom of the bowl.

|
|
Figure 37 - Final clean up on the bowl bottom
|
I use a wiping varnish (made by diluting regular varnish 50-50 with paint thinner) on my bowls. It usually takes four or five coats.
|
|
Figure 38 - The first coat of wiping varnish
|
|
|
Figure 39 - This bowl took four coats
|
The last operation is to buff a coat of
Carnuba Wax
on the bowl.

|
|
Figure 40 - Buffing
|
This bowl turned out quite nice. The spiral pattern was fairly easy to lay out and peg.
The bowl is going back to the person who gave me the cherry logs, in the hopes of getting more wood in the future.

|
|
Figure 41 - The completed bowl
|
If you have any questions you can email Rick at
rickandcathymorris@gmail.com
.
Return to
The Highland Woodturner
front page
|
|
|
|
|